Scottish Region 1: Loch Lomond and The Trossachs to Loch Tay - a fully detailed list of all the Mountains, Peaks, Tops and Hills (Page 3 of 3)
Scottish Region 1: Loch Lomond and The Trossachs to Loch Tay region is the area enclosed by an imaginary line connecting:
- Loch Awe to Ballinluig via the A85 through Dalmally, Inverlochy, Tyndrum & Crianlarich, the A85 through Glen Dochart and then the A827 through Killin, Loch Tay, Kenmore & Aberfeldy to the North
- Ballinluig to Perth via the A9 through Strath Tay to the East
- Perth to Stirling via the A9 through Auchterarder, Greenloaning & Dumblane to the South-East
- Stirling to the Firth of Clyde via the A811 through Kippen & Drymen and then the A812 through Alexandria & Dumbarton to the South
- The Firth of Clyde to Loch Awe via Loch Long to Arrochar, the A83 to Inveraray through Rest and be Thankful and then the A819 to the A85 through Glen Aray & Tullich to the West
If you count only the Marilyns there are 84 tops to climb, bag & conquer and the highest point is Ben More (The Crianlarich Hills) at 1,174m (3,853ft).
To see these Mountains, Peaks, Tops and Hills displayed in different ways - see the options in the left-hand column and towards the bottom of this page.
![]() Your Personal Bagging Record for Scottish Region 1: Loch Lomond and The Trossachs to Loch Tay
Your Personal Bagging Record for Scottish Region 1: Loch Lomond and The Trossachs to Loch Tay
LOG ON and RELOAD this page to show which Mountains, Peaks, Tops and Hills you have already climbed, bagged & conquered [. . . more details]
See this list in: Alphabetical Order
| Height Order‡
To reverse the order select the link again.
Mountain, Peak, Top or Hill:
Bagged

![]()
61. Meall nan Caorach
623m (2,044ft)
Meall nan Caorach is on interactive maps:
A downloadable go4awalk.com PDF Peak Bagging Map featuring Meall nan Caorach will be available soon. |
![]()
62. Meall Reamhar (Girron Burn)
618m (2,027ft)
Send it in and we'll publish it here.
Meall Reamhar (Girron Burn) is on interactive maps:
A downloadable go4awalk.com PDF Peak Bagging Map featuring Meall Reamhar (Girron Burn) will be available soon. |
![]()
63. Beinn Uamha
597m (1,959ft)
Beinn Uamha is on interactive maps:
A downloadable go4awalk.com PDF Peak Bagging Map featuring Beinn Uamha will be available soon. |
![]()
64. Beinn Uird
597m (1,959ft)
Beinn Uird is on interactive maps:
A downloadable go4awalk.com PDF Peak Bagging Map featuring Beinn Uird will be available soon. |
![]()
65. Binnean nan Gobhar
586m (1,923ft)
Binnean nan Gobhar is on interactive maps:
A downloadable go4awalk.com PDF Peak Bagging Map featuring Binnean nan Gobhar will be available soon. |
![]()
66. Beinn an t-Sidhein
572m (1,877ft)
Beinn an t-Sidhein is on interactive maps:
A downloadable go4awalk.com PDF Peak Bagging Map featuring Beinn an t-Sidhein will be available soon. |
![]()
67. Meall Gainmheich
566m (1,858ft)
Meall Gainmheich is on interactive maps:
A downloadable go4awalk.com PDF Peak Bagging Map featuring Meall Gainmheich will be available soon. |
![]()
68. Beinn Ghlas (Glen Shira)
550m (1,805ft)
Send it in and we'll publish it here.
Beinn Ghlas (Glen Shira) is on interactive maps:
A downloadable go4awalk.com PDF Peak Bagging Map featuring Beinn Ghlas (Glen Shira) will be available soon. |
![]()
69. Ben Clach
533m (1,749ft)
Ben Clach is on interactive maps:
A downloadable go4awalk.com PDF Peak Bagging Map featuring Ben Clach will be available soon. |
![]()
70. Beinn Dubh (Loch Chon)
508m (1,667ft)
Beinn Dubh (Loch Chon) is on interactive maps:
A downloadable go4awalk.com PDF Peak Bagging Map featuring Beinn Dubh (Loch Chon) will be available soon. |
![]()
71. Creag na Criche
456m (1,499ft)
Creag na Criche is on interactive maps:
A downloadable go4awalk.com PDF Peak Bagging Map featuring Creag na Criche will be available soon. |
![]()
72. Beinn Dearg (Loch Venachar)
427m (1,401ft)
Send it in and we'll publish it here.
Beinn Dearg (Loch Venachar) is on interactive maps:
A downloadable go4awalk.com PDF Peak Bagging Map featuring Beinn Dearg (Loch Venachar) will be available soon. |
![]()
73. Cruach Tairbeirt
415m (1,362ft)
Cruach Tairbeirt is on interactive maps:
A downloadable go4awalk.com PDF Peak Bagging Map featuring Cruach Tairbeirt will be available soon. |
![]()
74. Birnam Hill (King's Seat)
404m (1,325ft)
Send it in and we'll publish it here.
Birnam Hill (King's Seat) is on interactive maps:
A downloadable go4awalk.com PDF Peak Bagging Map featuring Birnam Hill (King's Seat) will be available soon. |
![]()
75. Craig of Monievreckie
400m (1,313ft)
Send it in and we'll publish it here.
Craig of Monievreckie is on interactive maps:
A downloadable go4awalk.com PDF Peak Bagging Map featuring Craig of Monievreckie will be available soon. |
![]()
76. Torlum
393m (1,289ft)
Torlum is on interactive maps:
A downloadable go4awalk.com PDF Peak Bagging Map featuring Torlum will be available soon. |
![]()
77. The Fruin
361m (1,185ft)
The Fruin is on interactive maps:
A downloadable go4awalk.com PDF Peak Bagging Map featuring The Fruin will be available soon. |
![]()
78. Conic Hill
361m (1,184ft)
Conic Hill is on interactive maps:
A downloadable go4awalk.com PDF Peak Bagging Map featuring Conic Hill will be available soon. |
![]()
79. Ben Bowie
313m (1,027ft)
Ben Bowie is on interactive maps:
A downloadable go4awalk.com PDF Peak Bagging Map featuring Ben Bowie will be available soon. |
![]()
80. Knock of Crieff
279m (915ft)
Knock of Crieff is on interactive maps:
A downloadable go4awalk.com PDF Peak Bagging Map featuring Knock of Crieff will be available soon. |
View these 84 Mountains, Peaks, Tops and Hills:
- On an Interactive Google Map (loads faster)
- On an Interactive Google Map with a list of tops below it.
(makes it easier to locate a particular top) - On a Detailed List in:
Alphabetical Order | Height Order - On one page with 'yet-to-be-bagged' listed 1st & then 'already-bagged' tops listed 2nd in:
Alphabetical Order | Height Order - On one page with 'already-bagged' tops listed 1st & then 'yet-to-be-bagged' tops listed 2nd in:
Alphabetical Order | Height Order
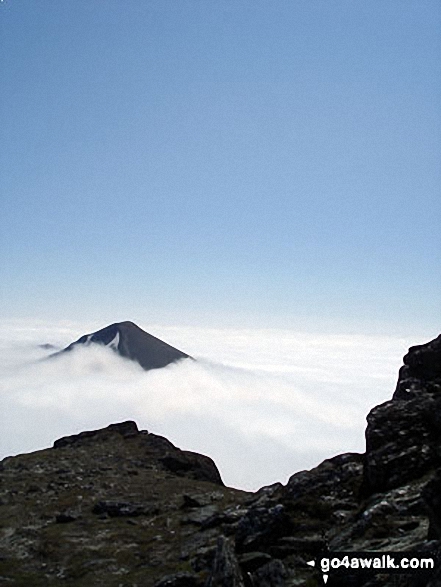 Ben More (The Crianlarich Hills) in Loch Lomond and The Trossachs to Loch Tay
Photo: Adam Shewry
Is there a Mountain, Peak, Top or Hill missing from the above google map or list?
Let us know an we will add it to our database.
To contribute to go4awalk.com or to contact us about anything at all - see Talk To Us.
For help see Help.
go4awalk.com and go4awalk.co.uk are registered trademarks of TMDH Limited.
Copyright © 2000-2025 TMDH Limited. All rights reserved.
Copyright Terms & Conditions Privacy Statement
A - Z Walks Home Log On/Accounts Photo Gallery Walk Ideas and Collections Fell Facts Hill Skills Walking Questions and Answers Your Stories News Competitions Product Reviews/Gear Tests Walking Gear Guides Peaks and Mountains Peak Bagging Find New Walking Friends Camping GPS Waypoints for Walking Contents Walk Search Talk To Us go4awalk.com Help Free Example Walks Newsletter