Walk Photographs and views from British Walks published during 2016

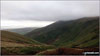
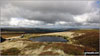
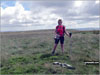
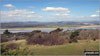
A cold and frosty morning in the Whiteadder River valley, Berwickshire


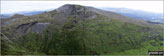
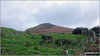
Cnicht - aka The Welsh Matterhorn - from Croesor

Cnicht - aka The Welsh Matterhorn - from the lane out of Croesor

Cnicht - aka The Welsh Matterhorn - from the track across Croesor Bach

Moelwyn Mawr from the track across Croesor Bach

Cnicht - aka The Welsh Matterhorn from Croesor Bach

Porthmadoc and Tremadoc Bay/Bae Tremadog from the summit of Cnicht - the Welsh Matterhorn

Moelwyn Mawr from the summit of Cnicht - the Welsh Matterhorn
Moel-yr-hydd (left) and Moelwyn Mawr (centre) from the summit of Cnicht - the Welsh Matterhorn

Moelwyn Mawr (centre) from the summit of Cnicht - the Welsh Matterhorn

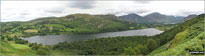
Llyn y Biswail with Snowdon (Yr Wyddfa) in the distance from the summit of Cnicht (North Top)

Llyn Cwm-y-foel (left) and Cnicht (right) from near Llyn Yr Adar

Llynnau Diffwys with Moelwyn Mawr beyond from near Llyn Yr Adar

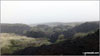
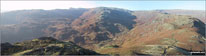
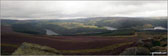
Cwm Croesor from Clogwyn Brith

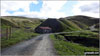
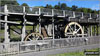
Old mine incline near Rhosydd Quarry

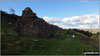
Ruined buildings in Rhosydd Quarry

Ruined buildings and machinery in Rhosydd Quarry

Disused incline in Rhosydd Quarry

Rhosydd Quarry ruins with Cnicht (left) and Cnicht (North Top) beyond

Blaenau Ffestiniog with Manod Mawr beyond from the summit of Moel-yr-hydd

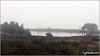
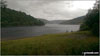
Tanygrisiau Reservoir from the summit of Moel-yr-hydd


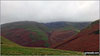
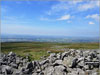
Craigysgafn and Moelwyn Bach from Moelwyn Mawr


The north-west ridge of Molewyn Mawr from the summit of Moelwyn Mawr

Cnicht and Cnicht (North Top) across Cwm Croesor from the summit of Moelwyn Mawr

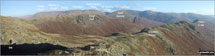
Ysgafell Wen beyond Clogwyn Brith from the summit of Moelwyn Mawr

Croseor and Porthmadoc from the summit of Moelwyn Mawr

Tremadoc Bay/Bae Tremadog from the summit of Moelwyn Mawr

Craigysgafn and Moelwyn Bach from the summit of Moelwyn Mawr

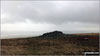
Approching the summit of Craigysgafn

Croseor with The Moel Hebog mountains beyond from the summit of Craigysgafn

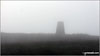
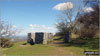
Ruined winding gear tower on Bwlch Stwlan

Cnicht (centre) and Cnicht (North Top) (right) from the lower slopes of Moelwyn Bach

Old rusting ladder stile on the lower slopes of Moelwyn Bach
Looking back to Millom and Duddon Sands from the path up Black Combe
Approaching Black Combe Screes
A helpful arrow leading to Black Combe summit
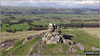
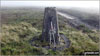
Black Combe summit Trig point and shelter
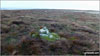
Apporaching White Combe summit cairn
Looking back over Black Combe and Whitecombe Screes from White Combe
Black Combe from the col on White Hall Knott
White Hall Knott from the path off White Combe
Looking back up to White Hall Knott

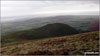
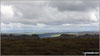
Clouds over the higher fells looking back towards Boot from Great Worm Crag

Devoke Water and the Birker Fells from Great Worm Crag

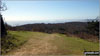
Looking towards Green Crag (Ulpha Fell) from Great Worm Crag

Harter Fell (Eskdale) (right) and Green Crag (Ulpha Fell) (left) from Great Worm Crag

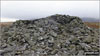
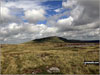
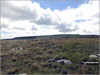
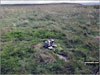
Great Worm Crag's larger summit cairn


Green Crag (Ulpha Fell) from Great Worm Crag
A stone building with 'rust coloured roof' mentioned in walk c441
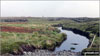
View across the derelict wall on Middlehope Moor
Old mining machinery at Nenthead Mining Museum
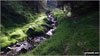
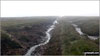
The wooded valley that was formally Dowgang Hush
A ruined mine building and the path to Dowgang Hush
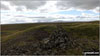
View from Middlehope Moor summit
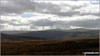
The Howgills from Calf Top summit

Great Coum and Gragareth from Castle Knott
The final climb to Calf Top summit
Eskholme Pike summit cairn and view
Bogs on the way to Westernhope Moor Summit
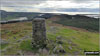
Fendrith Hill Summit Trig Point
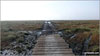
A useful wooden path across the Swinhope Moor bog
Currick on the descent from Fiend's Fell
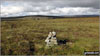
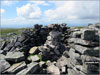
Cairn on the summit of Chapelfell Top
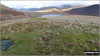
Small Pond on the way back to St John's Chapel
Westernhope Moor Summit Trig Point
Little Fell (Burton Fell) from the path to Mickle Fell
Misleading Trig Point shaped cairn on Little Fell (Burton Fell)
Fiend's Fell Summit Trig Point
Rebuilt Cairn on Little Fell (Burton Fell) but still very small
Trig Point on Little Fell (Burton Fell)
Shelter hiding the Trig Point on Little Fell (Burton Fell)
Me with the very small summit cairn on Little Fell (Burton Fell)
The boundary ditch from Chapelfell Top


Looking down into Easedale from High Raven Crag below Helm Crag


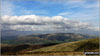
Grasmere with Loughrigg beyond from the top of High Raven Crag

Great Rigg (left). Stone Arthur (centre) and Heron Pike (right) from the top of High Raven Crag


High Raise (Langdale) and Coledale Head beyond Grasmere Common from Helm Crag


The Far Easdale Valley with Helm Crag (left) and Loughrigg (centre distance) from Brownrigg Moss


The Borrowdale Fells from Greenup Edge

High Raise (Langdale) from Low White Stones

Looking north across the High Raise (Langdale) massif

On the High Raise (Langdale) massif


Glaramara from Low White Stones summit

The Borrowdale Fells from Low White Stones

Low White Stones (foreground) with Borrowdale beyond from High Raise (Langdale)

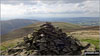
High Raise (Langdale) summit trig point


Blea Rigg (right) from Coledale Tarn

A fallen tree with babbling stream in Parkin Clough
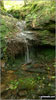
A hidden waterfall along the side of Ladybower Reservoir in Wiseman Hey Clough Woods
Ascending Winhill Pike (Win Hill) from Yorkshire Bridge
Ladybower Reservoir from Wiseman Hey Clough Woods
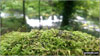
Moss in Wiseman Hey Clough Woods with the River Derwent in background
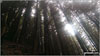
The Pines reaching to the Sky in Winhill Plantation
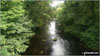
The River Derwent from Yorkshire Bridge
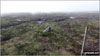
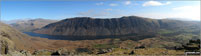
Panoramic from top of Winhill Pike (Win Hill) featuring Ladybower Reservoir

Mellbreak taken in the evening sunlight from the Kirkstile Inn in Loweswater Village
Loweswater photographed from the terrace path above Holme Wood


An old quarry with Faulds Brow summit on the horizon

The Solway Firth from Faulds Brow summit


Old Lime Kiln on Knipescar Common

Looking across Knipescar Common to Blencathra

Blencathra from the summit of Knipescar Common

Haweswater from the southern end of Knipescar Common

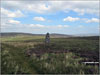
The boulder with memorial plaques on Caermote Hill summit

Bassenthwaite Lake from Caermote Hill

View from the summit of Caermote Hill

Binsey from the second boulder on Caermote Hill


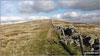
Cows blocking the way on St. John's Hill / Caermote Hill

Another herd of cows in my way on St. John's Hill / Caermote Hill

Yet more cows not exactly looking friendly on St. John's Hill / Caermote Hill


The delightful path by Swindale Beck back to Dufton
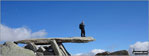
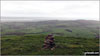
On the cantilever stone on Glyder Fach last sunday

On the cantilever stone on Glyder Fach last sunday


No smoking sign on the door of Buttermere Church, Buttermere

The interior of Buttermere Church, Buttermere

Plaque dedicated to Alfred Wainwright in Buttermere Church, Buttermere

The wrought iron 'Shepherd�s Gate', Buttermere Church, Buttermere


Dufton Pike taken from the top of Knock Pike

The small stone marking the summit of Howes


A small tarn near the summit of Howes


Scalebarrow Knott summit cairn

Morcambe Bay from Arnside Knott
The Irish Sea from Arnside Knott

Path through Red Hills Wood, Arnside Knott

Nation Trust Donation Pillar, Arnside Knott

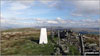
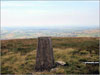
Arnside Knott summit Trig Point

The Blacksmiths Arms in Broughton Mills

The bridge over the River Lickle in Broughton Mills

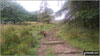
The path between Green Bank Farm and Scrithwaite Farm

View across Broughton from The Nursery


Green Bank Farm and Broughton Mills from the bottom of Hovel Knott


Hovel Knott from the summit of Dunnerdale Fell (Broughton Mills)

Great Stickle (Dunnerdale Fells) from the summit of Dunnerdale Fell (Broughton Mills)

Great Stickle (Dunnerdale Fells) summit trig point

Great Stickle (Dunnerdale Fells) summit cairn and trig point

Small Tarn between Great Stickle (Dunnerdale Fells) and Stickle Pike (Dunnerdale Fells)

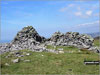
Stickle Pike (Dunnerdale Fells) summit cairn

Raven's Crag (Stickle Pike), summit cairn

The Knott (Dunnerdale Fells) summit cairn

Broughton from The Knott (Dunnerdale Fells)

Penny Crag Wood and Knott End Farm from the lowere slopes of The Knott (Dunnerdale Fells)

Knott End Farm from the lowere slopes of The Knott (Dunnerdale Fells)


Hesketh Hall in Broughton Mills

The path up Dunmallet from Pooley Bridge


Wonderful views from the path up Heughscar Hill from Pooley Bridge

Stone Circle on the way up Heughscar Hill

Grass covered limestone pavement on Heughscar Hill


Looking back on the scar of Heughscar Hill

An interesting road sign on the way down Swindale

The path to Langhowe Pike 'The Corpse Road'


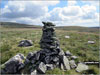
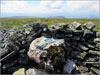
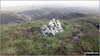
Large Cairn and shelter on Seat Robert


Haskew Tarn with High Wether Howe beyond from Seat Robert

The view from High Wether Howe


Another candidate for the summit of Fewling Stones


Gouther Crag from Beastman's Crag


Looking back on Gouther Crag from the descent


Whin Rigg (left) and Lund Bridge from Buckbarrow

Illgill Head (left) and Whin Rigg (right) above the Wast Water screes from Buckbarrow

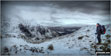
Snow on the distant Stob Binnein and Ben More from Ben Ledi

Snow scultured by the wind with the The Lawers range in the distance from Ben Ledi
Looking SW to the Irish Sea from the summit of Muncaster Fell
Burnmoor Tarn and the snow-capped Wasdale Fells from the summit of Boat How

Snow on Snowdon (Yr Wyddfa) at sunrise in January from the Rhyd Ddu path

Snow on Mynydd Mawr from the Rhyd Ddu path up Snowdon (Yr Wyddfa)
Snow on Bwlch Cwm Llan between Snowdon (Yr Wyddfa) and Yr Aran

Snow on Wild Boar Fell from Mallerstang

To contribute to go4awalk.com or to contact us about anything at all - see Talk To Us.
For help see Help.
go4awalk.com and go4awalk.co.uk are registered trademarks of TMDH Limited.
Copyright © 2000-2026 TMDH Limited. All rights reserved.
Copyright Terms & Conditions Privacy Statement
A - Z Walks Home Log On/Accounts Photo Gallery Walk Ideas and Collections Fell Facts Hill Skills Walking Questions and Answers Your Stories News Competitions Product Reviews/Gear Tests Walking Gear Guides Peaks and Mountains Peak Bagging Find New Walking Friends Camping GPS Waypoints for Walking Contents Walk Search Talk To Us go4awalk.com Help Free Example Walks Newsletter