Walk Photographs and views from British Walks published during 2008

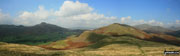
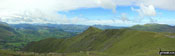
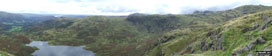
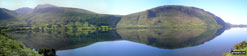
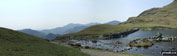
Hartsop Village with Grey Crag towering beyond from the shores of Brothers Water

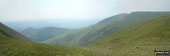
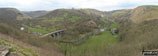
South toward The Kirkstone Pass from the shores of Brothers Water

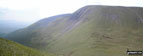
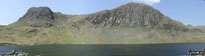
Hartsopp Dodd from the shores of Brothers Water


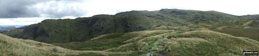
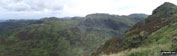
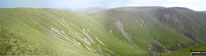
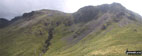
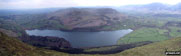
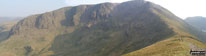
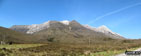
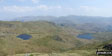
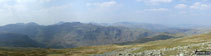
Blencathra (or Saddleback) from Bleaberry Fell

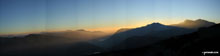
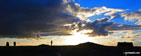
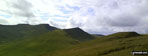
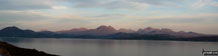
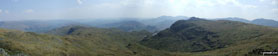
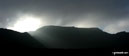
Sunset on Helvellyn, Fairfield (centre) and Seat Sandal from High Seat (Ashness Fell)


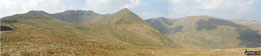
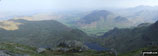
Dale Head (Newlands), Honister Pass and Grey Knotts from Hindscarth Edge

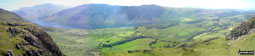
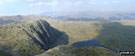
The Newlands Valley from Dale Head (Newlands)

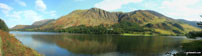
Loch Duich from Kintail Lodge (Hotel) near Shiel Bridge

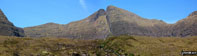
Approaching Sgurr nan Saighead (Sgurr Fhuaran) - one of the Five Sisters of Kintail

Sgurr an t-Searraich with Loch Duich beyond from Sgurr na Moraich

Loch Duich beyond from the lower slopes of Sgurr na Moraich

Dusk over Loch Duich from Kintail Lodge (Hotel) near Shiel Bridge


Burbage Rocks from Higger Tor.


Stanadge Edge from Higger Tor.

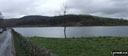
Temperature Inversion in Patterdale viewed from Place Fell


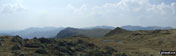
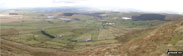
Looking West from Resting Stone

Bowland Knotts (Crutchenber Fell) from between Rock Cat Knott and Knotteranum

Bowland Knotts (Crutchenber Fell)

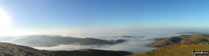
Temperature Inversion seen from the summit of Helvellyn


Craig Cwm Cynwyn, Cribyn, Craig Cwm Sere, Pen y Fan and Corn Du from Fan y Big

My Dog 'Skye' on the summit of Corn Du


Yewbarrow at sunrise from Wast Water

Caw (Dunnerdale Fells) from Seathwaite (Duddon Valley)

Harter Fell and Green Crag from Boat How

Boat How with Kirk Fell beyond


Strath More and Loch Hope from near Alltnacaillich

Beinn Ghobhlach across Little Loch Broom from near Badcaul

Ardvreck Castle on the shores of Loch Assynt with Quinag beyond from Ichnadamph

Oldshoremore Beach near Kinlochbervie

Striding Edge from Helvellyn in all its glory

Wast Water from teh summit of Great Gable

Styhead Tarn from Windy Gap bewteen Great Gable and Green Gable


Looking back to Grindsbrook, on the way to Crowden Tower (Kinder Scout)

Crowden Tower (Kinder Scout) from Grindslow Knoll (Kinder Scout)

Mist and low cloud over Grindsbrook Clough, Kinder Scout

An interesting rock on the top of Upper Tor, Kinder Scout

Kinder Reservoir and Mermaid's Pool from near the Kinder Downfall, Kinder Scout

Granby Wood and The Lake in Longshaw Country Park

White Edge (Big Moor) (South East Top) trig point


The Aiggin Stone on Blackstone Edge

The Aiggin Stone plaque and cairn on Blackstone Edge

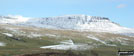
Bullman Hills summit with Cross Fell beyond

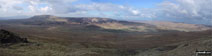
The view from the summit of Bullman Hills


Looking south from dismantled railway on the dge of St Josephs Wood


Starting the GR7 from Tarifa is a 7km beach walk - on the southern end of the GR7

The GR7 involves plenty of walking on by-roads - on the southern end of the GR7

Starting a cobbled path up to Castillo de Castellar - on the southern end of the GR7

Morning walking out of Jimena de la Frontera up through maquis - on the southern end of the GR7

From above looking back to Jimena and Gibraltar - on the southern end of the GR7

Lunch time at Benacoaz - on the southern end of the GR7

Misty start - approaching Llanos Republicano and Siera Libar - on the southern end of the GR7

Near the top of Sierra Libar - a wonderful ascent! - on the southern end of the GR7

From Montejaque the GR7 goes northeast up the zig zags toward Ronda - on the southern end of the GR7

Looking toward Ronda across the valley of the Rio Guadiara - on the southern end of the GR7

The days walk to Ronda crosses the terrain below and beyond - on the southern end of the GR7

Patriot Gary Davies on the summit of Ben Nevis

Gary Davies and Kieron Dunning on the summit of Ben Nevis

Loch Linnhe from the summit of Ben Nevis

Garbh Mheall from Rannoch Forest

Garbh Mheall from Rannoch Forest

The view south from Caisteal Abhail towards Cir Mhor

Roman Fell from Hilton Town Head


Hilton Beck emerging from Scordale

Mell Fell and Delfekirk Scar from Swindale Edge


Swindale Edge from Christy Bank


Climbing Little Fell (Burton Fell) with the Vale of Eden and the Lake District beyond

Little Fell (Burton Fell) South East Top

Little Fell (Burton Fell) trig point

Little Fell (Burton Fell) summit cairn with Mickle Fell beyond

Discarded ordnance on Little Fell (Burton Fell)

Mickle Fell from Little Fell (Burton Fell)


Swarth Beck at the head of Scordale


Round Hill (Tyne Head) summit cairn


The River Wye in Water-cum-Jolly Dale

The River Wye in Water-cum-Jolly Dale

The River Wye in Water-cum-Jolly Dale

The River Wye in Water-cum-Jolly Dale

Rock Formations in Water-cum-Jolly Dale

Two Swans in Water-cum-Jolly Dale

The River Wye in Water-cum-Jolly Dale

The River Wye in Water-cum-Jolly Dale

East Buxton Lime Kilns near Miller's Dale

East Buxton Lime Kilns near Miller's Dale

Miller's Dale Station Buildings


The Monsal Trail and the River Wye in Wye Dale

Tunnel on The Monsal Trail in Wye Dale

The Monsal Trail where it passes through a tunnel in Wye Dale

The Monsal Trail in Wye Dale where it emerges from one tunnel to reach a 2nd blocked one


The Monsal Trail crossing a footbridge over The River Wye in Chee Dale


Bridge of the River Wye in Upperdale

View from the Monsal Trail in Upperdale

The River Wye and Monsal Dale from Monsal Head Viaduct


Waterfall on the River Wye, Monsal Dale

Waterfall on the River Wye, Monsal Dale

The Monsal Trail in Monsal Dale

The Monsal Trail in Monsal Dale

Viaduct over The River Wye in Chee Dale

The Monsal Trail near Miller's Dale Station


The Monsal Trail at Miller's Dale Station

The Monsal Trail near Miller's Dale Station

The River Wye from Monsal Head Viaduct


River Wye Waterfall in Water-cum-Jolly Dale near Cressbrook

The River Wye in Water-cum-Jolly Dale

The Monsal Trail in Water-cum-Jolly Dale


On the Miners Track heading for Snowdon (Yr Wyddfa)

The River Greta from the dismantled railway line North East of Keswick

High Rigg summit cairn - with Blencathra or Saddleback (Hallsfell Top) beyond


High Snockrigg and Robinson across Buttermere

The Edge of Crag Wood at Buttermere's South Eastern shore

Stickle Pike (Dunnerdale Fells) summit and a hazy view of Caw

High Stile, Red Pike (Buttermere) and Dodd (Buttermere) from across Buttermere

Refelections in Coniston Water

Daybreak over Farleton Fell from near Milnthorpe

Elterwater with Lingmoor Fell (left) and The Langdale Pikes (right)
*Pen-y-ghent covered in snow from Horton in Ribblesdale

Falls of the Braan at the Hermitage, near Dunkeld

Falls of the Braan at the Hermitage, near Dunkeld

Falls of the Braan at Ossian Hall, near Dunkeld

The River Braan near Ossian Hall, near Dunkeld

In the woods near Ossian Hall, near Dunkeld

Sheep in Edale on the path to Barber Booth


Mam Tor from the lower slopes of Lose Hill (Ward's Piece)

Pen-y-ghent from the Pennine Way on Fawcett Moor

Pen-y-ghent from Fountains Fell

Holyhead from the summit of Holyhead Mountain

Defensive ditch from Foel Fenlli


Llyn Cwmorthin, Allt y Ceffylau and Allt-fawr from Moel-yr-hydd


Penchrise Pen summit trig point, Teviotdale

Penchrise Pen from Pike Fell (Teviotdale)


The Cheviot from Bloodybush Edge

The Scottish Border ridge from Yarnspath Law


Bannerdale Crags from Bowscale Fell


Kinder Reservoir with Kinder Downfall on the horizon (centre right)


The Pennine Way where it climbs up to Kinder Scout from Mill Hill (Ashop Head)

Near Sandy Heys on The Pennine Way approaching Kinder Downfall with Cluther Rocks beyond

Looking South West from Kinder Downfall

Rock formation near Kinder Downfall

The River Kinder from Kinder Downfall


Kinder reservoir from the top of Kinder Downfall

Catstye Cam from Hole-in-the-wall


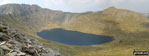
Red Tarn (Helvellyn) from Striding Edge

Grisedale with St Sunday Crag (right) from the outflow of Grisedale Tarn

Ruthwaite Lodge (Climbing Hut), upper Grisedale with Fairfield in the background

Seat Sandal towering above Grasmere

Lingmoor Fell (left) and the Langdale Pikes (right) from Elterwater

Great Langdale Beck from The Cumbria Way near Elterwater


The Old Dungeon Ghyll, Great Langdale


Harrison Stickle and the Langdale Pikes from Great Langdale


Sign in a field near Loughrigg Tarn


Ornate Water Fountain in Nenthead

Entrance to Nenthead Mines Heritage Centre

Nenthead Mines Heritage Centre exhibit

Nenthead Mines Heritage Centre exhibit

Nenthead Mines Heritage Centre exhibit

Disused Reservoir above Nenthead Mines Heritage Centre

Nenthead Mines Heritage Centre from Old Carr's Burn


Pool at the bottom of Dowgang Hush

Old Carr's Burn at the bottom of Dowgang Hush


Carrshield Moor from the hut at the head of Bridge Cleugh

Killhope Law from summit cairn on The Dodd


Killhope Cross on A689 at the border between County Durham and Northumberland


Semi-derelict hut on Killhope Law


Killhope Law summit trig point


Disused Quarry on the Weardale Way near Cowshill


Howgill Cottages from Tindale Fells


Cold Fell Pike (Geltsdale) summit cairn and trig point


Climbing 'The Street' between Swineside Law and Hindside Knowe

Mozie Law (left) and Windy Gyle (right) from Swineside Law

Climbing Windy Gyle via the Pennine Way

Russell's Cairn on the summit of Windy Gyle


Sign on a door of a farm house at Holwick Scars, Holwick


Unusual Sheep and Dove sculptured stile west of Holwick Scars

Detail of unusual Sheep and Dove scultured stile west of Holwick Scars


Wether Cairn and Kidland Forest from Cushat Law

Cushat Law summit cairn and shelter with The Cheviot in the distance

Bloodybush Edge summit trig point with Cushat Law in the distance


Clennell Street on the flank of Yarnspath Law

Clennell Street on the descent into Alwinton

Miners Bridge over Church Beck

Old mine workings in the Levers Water Beck valley

Disused mine entrance above Crowberry Haws

Old mine buildings above Crowberry Haws

Old mine equipment above Crowberry Haws

Low Water from The Old Man of Coniston

The Ordnance Survey Triangulation Piller on the summit of The Old Man of Coniston

The huge summit cairn on Coniston Old Man

The huge summit cairn on Brim Fell

Keld Gill Head, Red Dell Head Moss and Wetherlam from Swirl How


Levers Water and The Old Man of Coniston from Black Sails summit cairn

The church in the village of St John's Chapel, Weardale


Carr Brow Moor beyond Weardale from the lower slopes of Chapelfell Top


Fendrith Hill summit trig point

Ski Tows near Dora Seat on Swinhope Moor

Westernhope Moor summit trig point


Trig Point on the northern end of the Black Hill (Westernhope Moor) ridge

Peacock at a farmhouse in Brotherlee


Grey Nag summit cairn, trig point and wall


Discarded ironwork and trig point on Black Fell (Haresceugh Fell) summit

Boggy ground on Haresceugh Fell

Boggy ground on Haresceugh Fell


Cairn near Tarn Hole Edge with Cow Green Reservoir in the distance


Cairn on western edge of Three Pikes with Viewing Hill beyond


Cairn Coldberry End with Three Pikes in the background

Cairn and Trig Point on Great Stony Hill summit

Currick on the path North-West of Great Stony Hill

Another cairn beside the fence North-West of Great Stony Hill


Boggy ground between Scaud Hill and Redgleam (Harwood Common)

Boggy ground between Scaud Hill and Redgleam (Harwood Common)

Redgleam (Harwood Common) summit cairn

Ski Tow station on the lower slopes of Redgleam (Harwood Common)

Ski Tow on the lower slopes of Redgleam (Harwood Common)

Ruin on the lower slopes of Redgleam (Harwood Common)

The beck we followed up Viewing Hill from Holdenhurth Band


Silver Cove and Caw from Iron Crag


Stoop Band Bothy on the lower slopes of Cross Fell

Cross Fell from a cairn on Ironwell Band

Cuns Fell and Melmerby Fell from Cross Fell's snow clad western edge


Great Dun Fell and Little Dun Fell from the tall cairn on Cross Fell summit plateau

Great Dun Fell from Little Dun Fell

Great Dun Fell summit radar station


Arncliffe and Littondale from Yew Cogar Scar


Stangill Barn from The Pennine Way north of Water Houses, Malham Tarn

Great Hill Scar from The Pennine Way near Tennant Gill Farm

Beacon on the top of Fountains Fell
Pen-y-ghent and Plover Hill from the Pennine Way on Fountains Fell

Fountains Fell summit cairn with Pen-y-ghent in the background

Fountains Fell (South Top) summit cairn

Fountains Fell Tarn near Fountains Fell (South Top)

Trig point on the summit of Darnbrook Fell

Darnbrook Fell summit trig point

Littondale with Horse Head Moor beyond from Wilson's Pasture on the lower slopes of Darnbrook Fell

Farm building built in 1748 in Nether Hesleden

Farm building built in 1703 in Nether Hesleden

'New Bridge' over the River Skirfare

The River Skirfare from 'New Bridge'

The River Skirfare from 'New Bridge'


Yockenthwaite and Upper Wharfedale from Buckden Rake


Climbing Yockenthwaite Moor via Strans Gill

Yockenthwaite Moor summit trig point

Ruin in the lower slopes of Yockenthwaite Moor near Yockenthwaite village


Yockenthwaite Bridge over the River Wharfe


Whernside from Tow Scar Trig Point

Tow Scar Trig Point with Ingleborough on the horizon


Kingsdale and Ingleton from Gragareth

Higher Shelf Stones from the Pennine Way where it crosses the A57 Snake Pass

Feather Bed Top - the grassy summit of Featherbed Moss

Mill Hill (Ashop Head) summit cairn

The Kinder Plateau from Mill Hill (Ashop Head)

Mill Hill (Ashop Head) from the huge cairn on the western edge of The Kinder Plateau

The Edge (Kinder Scout) summit trig point

The River Kinder from Kinder Downfall


Great Knoutberry Hill (Widdale Fell) summit


Great Knoutberry Hill (Widdale Fell) from Stone House Bridge

The Arten Gill Beck railway viaduct and Wold Fell from near Cowgill


The Water Cut Sculpture on Lady Anne's Way, Mallerstang Valley

Outhgill and the Mallerstang Valley 'through' The Water Cut Sculpture on Lady Anne's Way


Beacon on Little Fell (Lunds Fell) (Mallerstang)

Little Fell (Lunds Fell) (Mallerstang) summit cairn

Hugh Seat summit - Lady's Piller

Cairn on Archy Styrigg (Gregory Chapel)

High Seat (Mallerstang) summit cairn

Cairn on Mallerstang Edge on the descent from High Seat (Mallerstang)

Swarth Fell and Wild Boar Fell from Mallerstang Edge


Bridge over The River Eden, Mallerstang

Rawthey Gill Quarry waterfall from above

Ice on Rawthey Gill Quarry waterfall

The River Rawthey from Rawthey Bridge

An icy Rawthey Gill on Holmes Moss

Frozen waterfall at Rawthey Gill Foot, Baugh Fell

Baugh Fell (Tarn Rigg Hill) summit trig point

The view north west to the Lake District from Baugh Fell (Tarn Rigg Hill)

The view north to the Howgill Fells from Baugh Fell (Tarn Rigg Hill)

The River Eden from Frank's Bridge, Kirkby Stephen

Frank's Bridge over The River Eden, Kirkby Stephen

The River Eden, Kirkby Stephen


Podgill Viaduct and the Vale of Eden


Birkett Fell from Ladthwaite Beck


High Dukerdale from Birkett Hill summit

High Dukerdale from Birkett Hill


Hartley Birkett from Birkett Hill

The Vale of Eden from Birkett Hill

Birkett Fell from near Ladthwaite Farm

Birkett Fell from Hartley Fell

The Coast to Coast Walk up Hartley Fell towards Nine Standards Rigg

Faraday Gill on the way to Nine Standards Rigg


Nine Standards Rigg trig point

Nine Standards Rigg trig point

Nine Standards Rigg from White Mossy Hill summit cairn

Jack Standards Cairn on White Mossy Hill


Nateby Common (Tailbridge Hill) summit cairn

Wild Boar Fell from Great Bell (Long Crag)

A snowy Pen-y-ghent from Dale Head


Plover Hill summit cairn in snow

Descending the track to Foxup Moor from Plover Hill

Pen-y-ghent Gill and Dawson Close (right) from near Swan Dike

Dawson Close (left) and Pen-y-ghent Gill from near Swan Dike

Comb Fell from Hedgehope Hill summit


The track back from the summit of Calders


The Church of St Mary and St John, Hardraw

Looking back to Hawes from the Pennine Way half-way up Great Shunner Fell

The cross shaped shelter on the summit of Great Shunner Fell

Unusual cairn on the summit of Lovely Seat

The River Ure near Haylands Bridge

Unusual fish waymark near Hawes


Looking north to Lord's Seat along the Whitbarrow Scar ridge


Whinster Valley from Cartmel Fell (Raven's Barrow)

Knowe Crags from Hallsfell Top (Blencathra or Saddleback)

Lonscale Fell, Burnt Horse and Skiddaw Little Man from Atkinson Pike

A walker negotiates the 'awkward place' on Sharp Edge


Chapel Head Scar from Whitbarrow Scar


The Consiton Fells from the summit of Blawith Knott

The Langdale Pikes from Wise Een Tarn


Morecambe Bay sunset featuring Black Combe (right)

Calf Crag from Green Burn in Greenburn Bottom

Crummock Water and Buttermere with Grasmoor beyond from Hay Stacks (Haystacks)

Angle Tarn from Angletarn Pikes

Ali and James after the scramble up Angletarn Pikes


On the footbridge over Hayeswater Gill, Hayeswater Reservoir

Taking a breather before tackling Striding Edge


Nethermost Pike from Dollywaggon Pike

On Striding Edge in thick mist

St Sunday Crag shrouded in cloud from Dollywaggon Pike

Birkhouse Moor (left), St Sunday Crag (right) and Place Fell (centre) from near Grisedale Tarn

Ullswater from near Lanty's Tarn


Hen Comb (left), Gavel Fell, Carling Knott and Burnbank Fell (right) from Scale Hill, Loweswater

The Three Shire Stone on Wrynose Pass


Crummock Water with Low Fell beyond from Lanthwaite Wood


Low Water from the summit of The Old Man of Coniston


Goat's Water from the summit of Dow Crag


Surprise View near Ashness Bridge


Derwent Water from Brandlehow Bay

The Derwent Water Launch cruising Derwent Water from Brandlehow Bay

Glaslyn with the shoulder of Y Lliwedd (left) and Snowdon (Yr Wyddfa) on the right


The River Wharf tumbles through The Strid in Strid Wood, Wharfedale

Wild Flowers in Strid Wood, Wharfedale

Spiders doing their thing whilst the sun shines, Strid Wood, Wharfedale

The famous stepping stones over the River Wharfe at Bolton Abbey, Wharfedale


The Lowther Hills from Auchensow Hill

The Langdale Pikes from Elter Water

Ingleborough in mist beyond Limestone Pavement in Chapel-le-Dale

Cronkley Scar from The Pennine Way in Upper Teesdale near High Force


On the east coastal path between Millstone Point and Laggan, Isle of Arran

Whitehills from Boyndie Bay, Banff

Green Burn at the foot of Steel Fell
Helm Crag (left) and Steel Fell from Greenburn Bottom

Helm Crag from Greenburn Bottom

The Lion and The Lamb on Helm Crag from Greenburn Bottom


Thirlmere from Steel Fell (Dead Pike)


Greenup Edge and the Wythburn Fells from Steel Fell (Dead Pike) summit


Loughrigg Fell with Windermere beyond from between Steel Fell (Dead Pike) and Calf Crag
Broadstone Head, Ferngill Crag and Deer Bields from Brownrigg Moss


Mere Beck from Broadstone Head

Mere Beck from Broadstone Head

Grasmere, Easedale Tarn and Blea Rigg from Tarn Crag summit

The Langdale Pikes from Tarn Crag
Broadstone Head from Brownrigg Moss
Deer Bields, Ferngill Crag and Broadstone Head from Calf Crag


Grasmere and Easedale from Helm Crag
Steel Fell (left) and Seat Sandal (right) from Helm Crag


The Lion and The Lamb on Helm Crag

Loughrigg Fell and Grasmere from Helm Crag

Loughrigg Fell and Grasmere from Helm Crag summit


Cairn on Coldberry End with Three Pike beyond


The small cairn on Redgleam (Harwood Common)

Boundary Stone on Burnhope Seat

Burnhope Seat summit Trig Point


Trig Point and cairn on White Edge (Burnhope Reservoir)


Swaledale from The Coast To Coast Walk East of Keld

Swinner Gill Lead Mines and Gorge


East Grain from Swinner Gill Lead Mines


Stone Beacon West of Water Crag (Arkengarthdale)

Water Crag (Arkengarthdale) summit trig point

Water Crag (Arkengarthdale) summit shelter

Blakethwaite Peat Store, Gunnerside Gill

Wild flowers and Sourton Church

Lydford Viaduct from Sourton Tors


Sourton Tors summit Trig Point

Waiting for a paraglider to take-off on Sourton Tors

The path to South Hessary Tor from Princetown

Princetown from the path to South Hessary Tor with North Hessary Tor beyond


North Hessary Tor from South Hessary Tor


Boundary Stone on South Hessary Tor

Nun's Cross (a.k.a. Siward's Cross)

Ruin and Tree near Devonport Leat

Devonport Leat emerging from the hillside


Stone Cross beside Devonport Leat

Dartmoor Ponies near Devonport Leat

More Dartmoor Ponies near Devonport Leat

Devonport Leat tumbling down Raddick Hill

Devonport Leat on Raddick Hill


Falcon Clints and the River Tees from The Pennine Way south west of Cauldron Snout


West Fell, Hooksey, Randygill Top, Kensgriff and Wandale Hill from Yarlside


The River Rawthey with Calders beyond from the Cross Keys footbridge

West Fell, Hooksey and the shoulder of Randygill Top from Yarlside


Looking North to West Fell and the Bowderdale Beck Valley from Randygill Top
Linghaw behind Fell Head (Howgills) from near The Calf

The Calf from Bush Howe summit cairn

Long Rigg Beck valley from near Fell Head (Howgills)

Linghaw from Fell Head (Howgills) summit
The Calf and Calders from Fell Head (Howgills)


Sickers Fell, Rowantree Grains and Arant Haw from Calders


Cautley Crag, Cautley Spout, Yarlside, Cautley Holme Beck, and Cross Keys from Great Dummacks

Yarlside from the lower slopes of Great Dummacks

The River Rawthey and Cross Keys from the lower slopes of Great Dummacks
Cross Keys and The River Rawthey valley from Pickering Gill below Great Dummacks

Sunset beyond Didcot Power station from Cameron's Copse, South Stoke


Zeller See (the lake) and Zell am See (the town) from Schmittenhöhe


The cliffs between Vernazza and Corniglia, Cinque Terra


Helvellyn, Swirral Edge and Red Tarn from Hole-in-the-Wall


Cowpe Reservoir from Cragg High Level Tank


Boundary Stone on Top of Leach, Cowpe Moss


Fur Tor from the top of Lynch Tor


The 'Howitzer' on the summit of Helm Crag


Limestone Pavement on way to Whernside

Nearing the summit of Ingleborough

Rainboow seen from the summit of Ingleborough

Ingleborough summit trig point

Fan y Big, Cribyn and Pen y Fan from Brecon

Fan y Big, Cribyn and Pen y Fan from Cefn Cyff

Fan y Big, Cribyn and Pen y Fan from Cefn Cyff

South Landing Beach, Flamborough Head

South Landing Beach from the cliff top path, Flamborough Head

South Landing coast from the cliff top path, Flamborough Head

The cliff top path north of South Landing, Flamborough Head


Approaching the summit of Cribyn with Pen y Fan in the distance

Brecon from the summit of Cribyn

Neuadd Reservoir from the summit of Cribyn


Cribyn from Pen y Fan summit cairn

Milnthorpe Sands from Arnside (Morecambe Bay)

North Hessary Tor summit trig point


Roos Tor from Great Staple Tor


Drygarn Fawr from Caban-coch Reservoir


Water cascading down Caban-coch Reservoir Dam


Penygarreg Reservoir with the Bryn Eithinog ridge beyond

Water over flowing Penygarreg Reservoir Dam

Craig Cnwlch from Caban-coch Reservoir Dam


Bow Fell (Bowfell) summit cairn

Mickleden and Great Langdale from Bow Fell (Bowfell)


Bassenthwaite from the summit of Dodd (Skiddaw)

Skiddaw from the summit of Dodd (Skiddaw)

Cat Bells (Catbells) from the summit of Dodd (Skiddaw)

Striding Edge from Swallow Scarth, between Helvellyn and Nethermost Pike

Red Tarn and Striding Edge from Helvellyn

Birkhouse Moor with Ullswater beyond from Helvellyn

Bassenthwaite with Skiddaw beyond from Helvellyn


Grisedale Tarn with St Sunday Crag (centre left) and Fairfield (right)


Hay Stacks (Haystacks) above Ennerdale (featuring Black Sail Hut Youth Hostel) from Black Sail Pass

Ennerdale (featuring Loft Beck and Tongue Beck) from Black Sail Pass

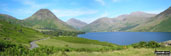
Yewbarrow and Great Gable from Wast Water, Wasdale

Yewbarrow Great Gable, Lingmell and Scafell Pike from Wast Water, Wasdale

The River Wye (downstream) from Sheepwash Bridge, Ashford in the Water
Kirk Fell (East Top) (left) and Kirk Fell from Black Sail Pass


Kirk Fell from Black Sail Pass

High Crag, Seat, Scarth Gap and Hay Stacks (Haystacks) from Looking Stead (Pillar)

Kirk Fell from the tarn above Black Sail Pass

Mosedale (Wasdale) with Yewbarrow beyond from Black Sail Pass

Yewbarrow beyond from Looking Stead (Pillar) summit cairn

Looking Stead (Pillar) summit cairn

The High Level Route from Looking Stead (Pillar) to Robinson's Cairn, Pillar

Looking Stead (Pillar) from The High Level Route, Pillar

Scarth Gap and Hay stacks (Haystacks) above Ennerdale from The High Level Route, Pillar

Robinson's Cairn with Pillar Rock beyond (left of the cairn and to right of the 'notch')

Pillar Rock beyond (to right of the 'notch') from the High Level Route


Mosedale (Wasdale) from Pillar


Mosedale (Wasdale) from Wind Gap

Black Crag (Pillar) summit cairn

Scoat Fell (Little Scoat Fell) from Steeple summit cairn

Steeple from Scoat Fell (Little Scoat Fell)

Scoat Fell (Little Scoat Fell) summit cairn with Steeple beyond

Red Pike (Wasdale) from Scoat Fell (Little Scoat Fell)

Mosedale (Wasdale) from Red Pike (Wasdale) summit cairn

Red Pike (Wasdale) from the cairn on Dore Head

Great Gable and Lingmell from Yewbarrow (North Top) summit

Scafell Pike, Mickledore and Sca Fell from Yewbarrow summit cairn

Illgill Head, Whin Rigg and Wast Water from Yewbarrow

Scafell Pike, Mickledore and Sca Fell above Wasdale Head from Yewbarrow

Grey Knotts summit cairn with Great Gable in the distance

Robinson towering above Honister Pass from the lower slopes of Grey Knotts


Ennerdale with Pillar (left) and High Stile (right) from Green Gable

The summit cairn on Green Gable with Great Gable beyond

Great End, Scafell Pike and Sca Fell from Great Gable summit

Kirk Fell with Pillar and Little Scoat Fell beyond from Great Gable summit

Wast Water with Illgill Head (left) and Yewbarrow (right) from Great Gable summit

Wast Water and The Wasdale Valley from Westmorland Cairn, Great Gable

Beck Head and Beckhead Tarn with Kirk Fell beyond from below Westmorland Cairn, Great Gable


Kirk Fell (East Top) summit cairn

Kirk Fell summit cairn with Great Gable in the background


Great Gable towering above Moses' Trod

Greengable Crag from Moses' Trod


Honister Slate Mine Steam Engine


Crook Crag (left) and Green Crag (behind right) from Low Birker Tarn

Green Crag (behind right) from Foxbield Moss

Looking west from the summit of Green Crag

Green Crag summit cairn with Harter Fell (Eskdale) beyond

Green Crag from the summit cairn on Crook Crag

Harter Fell (Eskdale) summit trig point

Eskdale from the summit of Harter Fell (Eskdale)

Hard Knott above Hardknott Pass seen from Harter Fell (Eskdale)

Hard Knott summit cairn - with Esk Pike, Bow Fell (Bowfell) and Crinkle Crags gracing the skyline

Harter Fell (Eskdale) from Hard Knott


Bow Fell (Bowfell) and Crinkle Crags (Long Top) from Hard Knott


Fleetwith Pike and Hay Stacks (Haystacks) from the campsite near Buttermere village

Binsey and Bassenthwaite Lake from (the lower slopes of) Sale Fell

Sale Fell summit cairn with a snow topped Skiddaw looming in the distance

Ling Fell (Wythop) from Sale Fell

Sale Fell from Ling Fell (Wythop)

Ling Fell (Wythop) summit trig point


Buckbarrow from Greendale Bridge, Greendale

Looking South West from the lower slopes of Buckbarrow


Cairn on the way up Buckbarrow

Illgill Head and the Wast Water Screes from Buckbarrow
The Scafell Massif, Illgill Head, Whin Rigg and the Wast Water Screes from Buckbarrow


Seatallan summit trig point and cairn

Seatallan summit trig point and cairn

Lingmell, Scafell Pike, Mickledore and Sca Fell above Wast Water from near Middle Fell (Wasdale)

Wast Water and The Scafell Massif from the summit of Middle Fell (Wasdale)

Middle Fell (Wasdale) summit cairn

Whin Rigg and Wast Water from Middle Fell (Wasdale) summit cairn

Yewbarrow with Kirk Fell, Great Gable and Lingmell beyond from Middle Fell (Wasdale)


Whin Rigg and the Wast Water Screes

Yewbarrow, Great Gable, Lingmell and the shoulder of Scafell Pike from Wast Water

Illgill Head and the Wast Water Screes
Yewbarrow, Great Gable, Lingmell, Scafell Pike and Sca Fell from Wast Water

Yewbarrow from Wasdale Head (near the campsite)

Fairfield from Dollywaggon Pike


Hanging Haystack Crag from Big Stanger Gill

Borrowdale featuring Rosthwaite and Stonethwaite from Hanging Haystack Crag

Rosthwaite Fell (Bessyboot) from above Hanging Haystack Crag

Big Stanger Gill above Hanging Haystack Crag

Rosthwaite Fell (Bessyboot) summit cairn

Approaching Rosthwaite Cam (Rosthwaite Fell) and Tarn at Leaves from Rosthwaite Fell (Bessyboot)

Dovenest Top from Rosthwaite Cam (Rosthwaite Fell)


Glaramara from Combe Door Top summit

Glararama from Combe Door Tarn

Combe Door Top from Combe Head


Red Beck ravine from Looking Steads (Glaramara)

Looking Steads (Glaramara) summit

Approaching High House Tarn Top


Langstrath from the head of Allencrags Gill

Looking back up Langstrath to the the head of Allencrags Gill


The Stonethwaite Valley South East of Stonethwaite


Mellbreak from near Maggie s Bridge, Loweswater


Grasmoor and Crummock Water from Holme Wood above High Nook Farm


Loweswater from the cairn on the North West end of the Carling Knott ridge

Looking up to Carling Knott summit

Carling Knott summit shelter with Blake Fell beyond


Murton Fell beyond Cogra Moss from Sharp Knott


The North Western Fells from Blake Fell summit

Murton Fell from Blake Fell summit

Gavel Fell summit cairn with Mellbreak and Grasmoor beyond

The cairn on the summit of Gavel Fell


Robinson (left), Buttermere and Red Pike (Buttermere) from Hen Comb

Hen Comb summit cairn with Mellbreak and Crummock Water beyond

Robinson (left), Buttermere and Red Pike (Buttermere) from Hen Comb summit cairn

Mellbreak with Grasmoor beyond from Hen Comb

Mellbreak from Mosedale (Loweswater)


Mellbreak from Maggie's Bridge

Blake Fell from Maggie's Bridge
Corn Du, Pen y Fan, Cribyn and Fan y Big from Craig Cwareli

Carn Mor Dearg from Carn Dearg Meadhonach (Carn Mor Dearg)

Ben Nevis from Carn Dearg Meadhonach (Carn Mor Dearg)

The Carn Mor Dearg Arete (CMD Arete) from Carn Mor Dearg

The view down Grindsbrook Clough

The view up Grindsbrook Clough

Climbing up Grindsbrook Clough

Nearing the top of Grindsbrook Clough

Looking down from the top of Grindsbrook Clough

The Edale Valley from between Noe Stool (Edale Head) and Pym Chair (Edale Head)


On the summit of Waun Rydd with the Black Mountains in the distance

The obligatory diving board photo on Fan y Big with Cribyn beyond


The Black Mountains from Waun Rydd

The Blaen Caerfanell waterfall near Blaen y Glyn


Rainbow seen from Haxted Mill in the Eden Valley

The summit of Grange Fell (Brund Fell)


Goldsborough from the Pennine Way, Cotherstone Moor


Shacklesborough from Goldsborough


Yellow Rattle in Hannah's Meadow, Baldersdale

Dalton Quarry in Middleton Dale near Stoney Middleton

Dalton Quarry in Middleton Dale near Stoney Middleton

Dalton Quarry in Middleton Dale near Stoney Middleton

Bridge over Saucer Hill Clough


Lad Law (Boulsworth Hill) summit Trig Point

Rock formations on the summit of Lad Law (Boulsworth Hill)

Rock formations on the summit of Lad Law (Boulsworth Hill)


The view looking North from the summit of Lad Law (Boulsworth Hill)

The Bronte Way & Pendle Way crossing Will Moor

Upper Coldwell Reservoir from Will Moor


The Nest and Eggs of a Ground nesting Bird on Bracken Hill

Temperature Inversion seen from the summit of Snowdon (Yr Wyddfa)


Hudeshope Beck from Skears Lime Kilns


Hardberry Hill summit trig point


Quarry near Stable Edge, Newbiggin


High Moor with Croker Hill (mast, far left) from the edge of Macclesfield Forest

Shutlingsloe from High Moor on the edge of Macclesfield Forest


The Cloud (Cheshire) from Shutlingsloe

Looking towards the Cat and Fiddle from the top of Shutlingsloe


Waymarker for The Tarka Trail on a gate post South of Belstone

The Dartmoor countryside South of Belstone


Belstone Tor from Belstone Common


Meldon Reservoir from Longstone Hill

Entering the firing range on Yes Tor


Vellake Weir at Vellake Corner

The bridge at the southern end of Meldon Reservoir


The Chesterfield Canal - Thorpe Top Triple Lock

Views from Carsington Water Visitors Centre

Views from Carsington Water Visitors Centre

Views from Carsington Water Visitors Centre


A beck in spate entering Greenup Gill

Alisongrass Crag and Borrowdale from Eagle Crag


Rosthwaite Fell from Sergeant's Crag summit


High Saddle (Coldbarrow Fell) summit cairn

High Saddle (Coldbarrow Fell) summit with Ullscarf beyond

Low Saddle (Coldbarrow Fell) summit cairn

Blea Tarn and Bell Crags from Low Saddle (Coldbarrow Fell)

Dock Tarn and Green Combe from Low Saddle (Coldbarrow Fell)

Eagle Crag and Sergeant's Crag from Low Saddle (Coldbarrow Fell)

Green Combe, Lord's How and Blea Tarn from Low Saddle (Coldbarrow Fell)


Great Brington's famous Althorp Coaching Inn - The Fox and Hounds

The countryside near Little Brington


Flamborough Head from Strottle Bank Nook


North Landing, Flamborough Head

North Landing, Flamborough Head

Looking across Thornwick Bay, Flamborough Head

Thornwick Bay, Flamborough Head

Thornwick Bay, Flamborough Head


Afon Rhaeadr-fawr from Bont Newydd


Aber Falls (Rhaeadr-fawr) - Close up!


St Sunday Crag from Patterdale


Grisedale Beck with Birkhouse Moor beyond


Grisedale Beck with Helvellyn in the distance

Grisedale Beck with St Sunday Crag beyond

Grisedale Beck with Helvellyn and Birkhouse Moor beyond

Grisedale from Brownend Plantation

St Sunday Crag (left) and Grisedale from Brownend Plantation
Striding Edge, Helvellyn, Swirral Edge and Catstye Cam from Hole-in-the-Wall

Catstye Cam from Birkhouse Moor summit

Birkhouse Moor summit cairn - with Striding Edge, Helvellyn, Swirral Edge and Catstye Cam beyond
Helvellyn, Red Tarn, Swirral Edge and Catstye Cam from Striding Edge

On Striding Edge - looking back to Birkhouse Moor

On Striding Edge - looking up to Helvellyn

The Robert Dixon Memorial on Striding Edge

The Memorial to Robert Dixon on Striding Edge


On Striding Edge on the way to Helvellyn

On Striding Edge en-route to Helvellyn


The 'Bad Step' at the western end of Striding Edge

The 'easier' path on the north side of Striding Edge

Helvellyn from the 'Bad Step' at the western end of Striding Edge

Striding Edge from the lower slopes of Helvellyn


Swirral Edge, Catstye Cam and Red Tarn from Helvellyn

The aircraft memorial on Helvellyn

The aircraft memorial on Helvellyn

Nethermost Pike and Dollwaggon Pike from Helvellyn
Helvellyn and Striding Edge from Nethermost Pike

Nethermost Pike summit cairn with Helvellyn and Catstye Cam beyond
Nethermost Pike, Helvellyn and Striding Edge from High Crag (Helvellyn)

High Crag (Helvellyn) summit cairn

Cofa Pike and Fairfield from High Crag (Helvellyn) with Red Screes in the distance


Helvellyn, Nethermost Pike and High Crag from Dollywaggon Pike


Grisedale Tarn from Dollywaggon Pike

Grisedale Tarn from Brothers' Parting Stone


Hartsop above How, Hart Crag and Fairfield from Deepdale Hause


Ullswater and Patterdale from Birks

The 'other side' of Durdle Door from St Oswald's Bay, The South West Coast Path

St Oswald's Bay and Dungy Head from Durdle Door, The South West Coast Path


Durdle Door, The South West Coast Path

Sea Arches at Stair Hole to West of Lulworth Cove, The South West Coast Path

Swyre Head with Bat's Head beyond from Durdle Door, The South West Coast Path

Wha House Farm and Esk Dale with Kepple Crag beyond from Hare Crag


Burnmoor Tarn from Slight Side

The River Esk and Crinkle Crags from Sca Fell

The path down to Foxes Tarn from Sca Fell

Great Moss and Crinkle Crags from the lower slopes of Sca Fell

Bow Fell (Bowfell) from above Cam Spout Crag

High Scarth Crag from Quagrigg Moss

Upper Eskdale and Bow Fell (Bowfell) from above Lingcove Bridge

Hard Knott from above Lingcove Bridge


The Furness Fells above Crook Beck from near Low Tilberthwaite

The Langdale Pikes from Wetherlam Edge

Beacon (Blawith Fells) and Beacon Tarn from Wool Knott

Little Langdale from Wetherlam Edge

Walna Scar, Dow Crag and The Old Man of Coniston from Beacon (Blawith Fells)

The Coniston Range from Beacon (Blawith Fells)

Walna Scar, Dow Crag and The Old Man of Coniston from the summit of Yew Bank


Cat Bells (Catbells) from Maiden Moor

Derwent Water with Keswick and the Skiddaw Massif beyond from High Spy


Cat Bells (Catbells) from the Derwent Water Ferry


Loch Linnhe (left), Fort William and Loch Eil from Ben Nevis

CJ with Tryfan in beyond from near Llyn Ogwen

Glan Dena and the Ogwen Valley from the summit of Tryfan

En-route to Rossett Pike from Great Langdale


On the �Cantilever Stone, Glyder Fach

The Outer Hebrides from near Dundonnell

On the Pennine Way approaching High Cup (High Cup Nick)

Nichol's Chair, High Cup (High Cup Nick)

On the Pennine Way near High Cup (High Cup Nick)

Looking South West down High Cup (High Cup Nick)

The South Western Rim of High Cup (High Cup Nick)

Dufton Pike from the Pennine Way near Peeping Hill


Tom na Gruagaich from Coire Mhic Nobuil, Torridon, Wester Ross

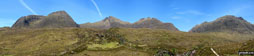
Sgurr Mhor (Beinn Alligin) from Coire Mhic Nobuil, Torridon, Wester Ross

Na Rathanan from Coire Mhic Nobuil, Torridon, Wester Ross


Spidean Coire nan Clach (Beinn Eighe) from the A896 near Loch Bharranch, Torridon, Wester Ross


Wandope (left), Whiteless Pike and Rannerdale Knotts (right) from above Hause Point, Crummock Water


Striding Edge, (left), Helvellyn and Catstye Cam (right) from Birkhouse Moor

Superb view of Striding Edge from Helvellyn

Helvellyn from Hole-in-the-Wall at the start of Striding Edge

Striding Edge, Helvellyn and Red Tarn from below Swirral Edge

Helvellyn and Red Tarn from below Swirral Edge

Little Langdale Tarn and Wetherlam

Blake Rigg and Pike of Blisco (Pike o' Blisco) from Little Langdale

Towards Loughrigg Fell from Little Langdale

Bridge End with the Langdale Pikes behind

The Langdale Pikes from Blea Moss near Blea Tarn (Langdale)


Lingmoor Tarn from Lingmoor Fell


Slater Bridge, Little Langdale


Loweswater and Darling Fell (right) from Mosedale Beck


High Snockrigg and Robinson, Buttermere and Fleetwith Pike from the summit of Hen Comb


Fleetwith Pike from Low Ling Crag, Crummock Water

Grassmoor from Low Ling Crag, Crummock Water

Fleetwith Pike and The High Stile massif from the North shore of Crummock Water

The Path to Hen Comb from Loweswater

Loweswater from Highpark, Crummock Water

Scale Beck near Crummock Water


Beinn Mheadhoin (left), A' Choinneach, Bynack More and Beinn a' Chaorainn from Lairig an Laoigh

The Newlands Valley from the summit of Cat Bells (Catbells)


Crib Goch at dawn from very close to the top of Snowdon (Yr Wyddfa)
*Moel Wnion with Anglesey and Conwy Bay beyond from the summit of Drosgl

Carnedd Llewelyn, Carnedd Dafydd and Yr Elen from Drosgl


Mountain Rescue Helicopter above Bera Mawr as seen from from Bera Bach

Foel-goch, Elidir Fawr, Mynydd Perfedd and Carnedd y Filiast from Carnedd Gwenllian (Carnedd Uchaf)

Bera Mawr with Anglesey and Conwy Bay beyond from Carnedd Gwenllian (Carnedd Uchaf)

Bothy on the summit of Foel Grach

Bera Bach and Bera Mawr from Llwytmor


Afon Goch Waterfalls with Llwytmor beyond

The Afon Rhaeadr-fawr valley from the top of Aber Falls (Rhaeadr-fawr)

Wild Ponies seen on the lower slopes of Llwytmor

On the summit of a very windy Pendle Hill (Beacon or Big End)


Afon Goch tumbling down Aber Falls (Rhaeadr-fawr)


Foel-goch, Elidir Fawr, Mynydd Perfedd and Carnedd y Filiast from Drosgl

*Starting up Stickle Ghyll from Great Langdale with Harrison Stickle (The Langdale Pikes) (far left)

Climbing up Stickle Ghyll towards Harrison Stickle (The Langdale Pikes) (left) from Great Langdale

*Stickle Tarn dam and outflow (The Langdale Pikes)
*Harrison Stickle and Pavey Ark (The Langdale Pikes) from Stickle Tarn

Approaching the summit of Sergeant Man


The High Raise (Langdale) summit trig point

Borrowdale from High Raise (Langdale)


High Raise (Langdale) (left) and Seargent Man (dark pimple far right) from Thunacar Knott
*Stickle Tarn with Great Langdale and Lingmoor beyond from Pavey Ark Summit (Langdale Pikes)

Harrison Stickle in silhouette from Pavey Ark (Langdale Pikes)
*Pavey Ark and Stickle Tarn with the Blea Ridge beyond from Harrison Stickle Summit (Langdale Pikes)


Rosset Gill and Mickleden Beck from Pike of Stickle (The Langdale Pikes)


Harrison Stickle from Pike of Stickle (The Langdale Pikes)

Loft Crag from Pike of Stickle (The Langdale Pikes)

Pike of Stickle from Loft Crag (The Langdale Pikes)


On the Watkin Path enroute to Mount Snowdon (Yr Wyddfa)

Windermere from a wet and rainy Orrest Head

Looking North West to Windermere from a wet and rainy Orrest Head


Wansfell Pike from the Garburn Road, Applethwaite Common

Kinder Reservoir with Kinder Scout beyond from White Brow

Kinder Reservoir from William Clough

Rock formations in Kinder Scout

The sun setting over the bay at Abercastle

My walking companions (Morgan � the black labrador and Tali � the fox red labrador) at Abercastle

The River Dove in Beresford Dale with Wolfscote Hill above

The River Dove in Beresford Dale

The River Dove in Wolfscote Dale


The view down Comb Beck as it flows towards Buttermere

Derwent Water from near Lady's Rake, Walla Crag

Low Rigg and High Rigg from Castlerigg Stone circle.

Keswick and Derwent Water from Dodd (Skiddaw).

Ben Vorlich (Coire Garbh) from near Derry on the North shore of Loch Earn

Ladybower Reservoir from Bamford Edge

An aggressive grouse on Bamford Edge
*The view South from the summit of Hownam Law

Cogra Moss with Blake Fell beyond

Skiddaw (in the mist) and Dodd (Skiddaw) from across Bassenthwaite Lake


Looking South towards Troutbeck and Windermere from Troutbeck Tongue summit

Hagg Gill Bridge from Troutbeck Tongue

Great Langdale from below Loft Crag

The Langdale Pikes from Chapel Stile

The Langdale Pikes from Elter Water


Gordale Scar from New Close Knotts

Backstone Barrow with Troutbeck beyond from the lower slopes of Sour Howes


Striding Edge (left) and Helvellyn from near Hole-in-the-wall

Ullswater from Glenridding Dodd

Grindsbrook Clough from The Nab

Mynydd Troed from Pen Cerrig-Calch


Caer Caradoc Hill from Ragleth Hill

Caer Caradoc Hill from Pole Bank (Long Mynd)

Stiperstones (Manstone Rock) Summit

Stiperstones (Manstone Rock) summit Trig Point

Hudderstone from Lamington Hill


The bronze age bridge across the Colne Water at Wycoller on The Pendle Way.

Scenes from Big Pit Mining Museum, Blaenavon

Scenes from Big Pit Mining Museum, Blaenavon

Scenes from Big Pit Mining Museum, Blaenavon

Scenes from Big Pit Mining Museum, Blaenavon

Scenes from Big Pit Mining Museum, Blaenavon

Anglesea and Conwy Bay from the summit of Yr Orsedd

Anglesea and Conwy Bay from the summit of Foel Dduarth

Conwy Bay from the summit of Foel Dduarth

Afon Anafon with Drum (Carneddau) beyond from the summit of Yr Orsedd

The Iso Syöte region in February


The Leather Smithy, Ridgegate Reservoir

Shutlingsloe from the edge of Macclesfield Forest


Water channel between Upper and Lower Ogden Reservoirs
Looking East from the summit of Pendle Hill (Beacon or Big End)

Ogden Reservoirs from the summit of Pendle Hill (Beacon or Big End)

Approaching the summit of Pendle Hill (Beacon or Big End) from the South

The East face path up of Pendle Hill (Beacon or Big End)

The East face path up of Pendle Hill (Beacon or Big End) wih Pendle House below

Memorial seat on the Pendle Way near the North end of Lower Ogden Reservoir

On the Pendle Way crossing the Inlet stream feeding Lower Ogden Reservoir

On the Pendle Way crossing the Inlet stream coming from Upper Ogden Reservoir

Lower Ogden Reservoir from the Pendle Way near Fell Wood

On the Pendle Way in Fell Wood

Mynydd Tarw summit cairn in mist

The summit cairn on Foel Wen in mist

The trig point on the summit of Cadair Berwyn (North Top)

The large cairn on the summit of Moel Sych

The Cadair Berwyn ridge from Cwm Maen Gwynedd

Moel Sych from Cwm Maen Gwynedd

Looking SE down Cwm Maen Gwynedd from Buarth-yr-e

Looking NW up Cwm Maen Gwynedd to Cadair Berwyn from Tyn-y-ffridd

Loughrigg Fell (left), Rydal Water and Nab Scar from High Sweden Coppice


Great Ridge, Heron Pike and Windermere beyond from Fairfield


Deep Dale from the southern end


The River Wye and Ashford in the Water from Littel Shackleton Wood

The River Wye from the top of Monsal Head Viaduct


The blocked up tunnel entrance at Monsal Head


The River Wye (upstream) from Sheepwash Bridge, Ashford in the Water

Sheepwash Bridge over the River Wye, Ashford in the Water


The Church in the middle of Ashford in the Water

Pennyunk Lane, near Ashford in the Water

The Derbyshire countryside from Pennyunk Lane, near Ashford in the Water


Monsal Dale (The River Wye) from Monsal Head


The River Wye weir in Monsal Dale

The River Wye weir in Monsal Dale

The River Wye weir in Monsal Dale


Corn Du and Pen y Fan (centre left) and Cribyn (centre) from Neuadd Reservoir

Pen y Fan and Cribyn from near Neuadd Reservoir

Cribyn, Pen y Fan and Corn Du from Lower Neuadd Reservoir


Corn Du, Pen y Fan and Cribyn from Neuadd Reservoir

Looking down Glen Sligachan from the start of the pinnacle ridge at Sgurr nan Gilliean


Upper Loch Torridon from Mullach an Rathain

The Liathach Massif from Loch Clair

The Beach at South Landing, Flamborough Head


Selwicks Bay, Flamborough Head

Flamborough Head Lighthouse, Flamborough Head

Susan Hood on Carnethy Hill summit, The Pentland Hills

On a very windy Turnhouse Hill, The Pentland Hills

On Carnethy Hill, The Pentland Hills

Loganlea Reservoir and Glencourse Reservoir from the climb up Carnethy Hill, The Pentland Hills


New Forest Pony seen near Beaulieu Road Station

The Millennium Bridge over the River Tyne between Gateshead and Newcastle

The Sage Gallery Building, Gateshead


The Baltic Flour Building, Newcastle


The Tyne Bridge from the Millennium Eye Bridge, Newcastle

Tan Hill from the Pennine Way on Stonesdale Moor

Whiteside, Hopegill Head, Grasmoor (centre) and Mellbreak (mid ground) from Blake Fell


The Cheviot from Broadhope Hill

Ingleborough (in the distance left) and Green Hill (Gragareth) (foreground right) from Great Coum


The famous Pendle Witches in Newchurch in Pendle church


Hartsop village from Hartsop Dodd

Brock Crags (left), The Knott and Gray Crag (right) from Hartsop Dodd


Great Langdale and the distant fells from Crinkle Crags

Bow Fell (Bowfell) from the Three Tarns col between Crinkle Crags and Bow Fell (Bowfell)

Heading for The Band from the Three Tarns col between Crinkle Crags and Bow Fell (Bowfell)

Crinkles and Bowfell from Pike of Blisco (Pike o' Blisco)

The Langdale Pikes from Blea Tarn

The Langdale Pikes from Blea Tarn

The Coniston Fells from Pike of Blisco (Pike o' Blisco)


Derwent Water, Skiddaw and Blencathra from below Maiden Moor


The Helvellyn and Fairfield Massif from Dale Head (Newlands)

Skiddaw and Blencathra from Dale Head (Newlands)

February frosts around Elterwater

February frosts around Elterwater


High Seat (Ashness Fell) Summit Cairn

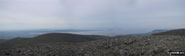
On High Seat (Ashness Fell) Summit

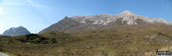
Blencathra from Bleaberry Fell

Keswick and Skidddaw from Bleaberry Fell

Helvellyn from Castle Crag (Ashness Fell)

The (tall) ladder stile and the Shoulthwaite Beck ravine south of Castle Crag (Ashness Fell)

Thirlmere from the summit of Raven Crag

Looking across Mickleden Beck towards the Bowfell Buttress (left) and Rossett Pike (right)

Great Langdale from below Loft Crag


Dove Crag, Hart Crag and Fairfield dominate the skyline beyond Brothers Water

The Langdale Pikes from Great Langdale


Stob Coir'an Albannaich from Loch Dochard


Skiddaw from below Ullock Pike


Looking East to Belncathra from the summit of Skiddaw


Looking up to Skiddaw from Whitewater Dash

The summit of Aran Fawddwy looking West towards the Rhinogs

View fhe summit of Aran Fawddwy looking North-East over Creiglyn Dyfi towards the Berwyns

360 degree panorama from the summit of Aran Fawddwy

Aran Fawddwy from shores of Llyn Tegid (Lake Bala)


Fremington Edge from Calver Hill

Maiden Paps from Skelfhill Pen, Teviotdale

Descending Skelfhill Pen, Teviotdale

Approaching Skelfhill Pen, Teviotdale from the East

Skelfhill Pen summit trig point, Teviotdale

Blackbeck Tarn with Great Gable towering beyond from Hay Stacks

Hedgehope Hill from Shill Moor

Great Gable, Scafell Pike (centre) and Kirk Fell from Fleetwith Pike

Benson Knott summit trig point

Gorse flowering on Scout Scar (Barrowfield)

Looking West from Scout Scar (Barrowfield)


Hawthorn on Humphrey Head, Morecambe Bay

Humblemoor Hill from Langside Law


The Cheviot Hills from the slopes of Woden Law

Approaching Calver Hill from Swaledale

White House in Arkengarthdale from Calver Hill


Crummock Water and Grasmoor with Buttermere in the foreground from Hay Stacks


Waiting for Cedric Robinson to guide us from Arnisde across Morecambe Bay to Kents Bank


The Newlands Valley from Carl Side

Looking South to Shutlingsloe from the summit of Shining Tor

Looking South to Shutlingsloe from the summit of Shining Tor

Black Scout and Coal Clough Wind Farm (right) from Black Clough (Deerplay Moor)

Heading towards Heald Moor from Thieveley Pike

Trawden from Abbot Stone (Boulsworth Hill)

Widdop Reservoir from Lad Law (Boulsworth Hill)

Looking South from the summit of The Storr

Looking South from the summit of The Storr

Beacon Tarn and Beacon (Blawith Fells) from Wool Knott

Crummock Water and Skiddaw from High Seat (Ashness Fell)

The Radar Station on Great Dun Fell from the Pennine Way on Cross Fell

Climbing Birkhouse Moor above Mires Beck

Shutlingsloe from near Three Shire Heads

The River Dane at Three Shire Heads

Cloud on The Fairfield Horseshoe from near High Sweden Bridge

Quarry Workings below Levers Water from near the Miners Bridge, Coniston

Coppermines Valley from near the Miners Bridge, Coniston

Boulder Valley (Coniston Fells)

Blake How reflected in Levers Water


The Old Man of Coniston summit from Brim Fell

Brown Pike from The Old Man of Coniston

Pen-y-ghent from Horton in Ribblesdale

Approaching Pen-y-ghent from Brackenbottom

Approaching Pen-y-ghent from Brackenbottom

Approaching Pen-y-ghent from Brackenbottom on The Yorkshire Three Peaks Challenge

Following the Pennine Way up the South ridge of Pen-y-ghent


On the summit of Pen-y-ghent during The Yorkshire Three Peaks Challenge

Pen-y-ghent from near Hull Pot

Derwent Water with Borrowdale beyond from Friar's Crag


The Roaches and Gun (Staffordshire) from the summit of Shutlingsloe

Low sun in Macclesfield Forest

Ascending Longstone Hill from Meldon Reservoir with Sourton Tors on the horizon

West Mill Tor from Yes Tor with Okehampton and North Devon in background

West Mill Tor from Yes Tor with Okehampton and North Devon in background

Yes Tor from the cairn on High Willhays

Approaching Black Tor (Walkhampton Common) from the South East

High Willhays from the trig point on Yes Tor

The ancient packhorse bridge at Wycoller

On the ancient packhorse bridge at Wycoller

Stone footbridge across Colne Water at Wycoller


Single span stone footbridge, Wycoller


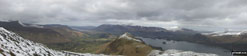
Rainbow over Ullswater from the summit of Place Fell

Jenny Smith on the descent from Place Fell to Sandwick with Ullswater in the background

Overflow channel at Lower Ogden Reservoir Dam


Approaching Upper Ogden Reservoir Dam


Lone tree on the access track between Lower and Upper Ogden Reservoirs

Overflow channel from Upper Ogden Reservoir

Water cascading down the overflow channel from Upper Ogden Reservoir

Pendle Water from Upper Ogden Reservoir Dam


Crossing Boar Clough on the way up Pendle Hill

Barley, Ing Ends and Ogden Reservoirs from the top Pendle Hill (Beacon or Big End)


Pendle Hill (Beacon or Big End) summit

The Derbyshire Countryside near Hopton


Canada Geese at Carsington Water


Early morning clouds rolling quickly over the edge on Stoodley Pike


The River Derwent below Castle Crag

A pair of Scots Pines amongst the old quarry workings on the side of Castle Crag

A misty Blea Crag on the descent down from Blea Rigg

Beacon Hill in the Ivinghoe Hills (a.k.a. Ivinghoe Beacon)

Lose Hill (Ward's Piece) emerging from a temperature inversion - seen from Winhill Pike (Win Hill)

The Edale Valley during a temperature inversion - as seen from Winhill Pike (Win Hill)


Sunset from the summit of Ingleborough

Sunset from the summit of Ingleborough

Sunset from the summit of Ingleborough


The Long Mynd and Church Stretton from the northern approach to The Lawley

Woodland below Caer Caradoc Hill

Lunch time on the summit of Caer Caradoc Hill

Looking South from Three Fingers Rock at the south east end of Caer Caradoc Hill

The Lawley (far left) and The Wrekin (in the distance) from Caer Caradoc Hill

Buttermere from the North West shore featuring Fleetwith Pike (just right of centre)

Wandope (left), Addacombe Hole and Crag Hill (Eel Crag) from Knott Rigg

Rannerdale Knotts (foreground) and Crummack Water with Mellbreak beyond from High Snockrigg

The Elephant Trees from White Kirkley

The Elephant Trees from The Weardale Way near Harthope

Gorple Reservoirs from Clough Head Stones


Nutley Windmill near Marlpits in the Ashdown Forest


The Transporter Bridge across the River Usk (Afon Wsyg) in Newport

The base of The Transporter Bridge across the River Usk (Afon Wsyg) in Newport


Looking west from The Transporter Bridge across the River Usk (Afon Wsyg) in Newport

Looking down from The Transporter Bridge across the River Usk (Afon Wsyg) in Newport

Road bridge over the River Usk (Afon Wsyg) from The Transporter Bridge across in Newport

On the Transporter Bridge across the River Usk (Afon Wsyg) in Newport

The M4 motorway bridge over the River Usk (Afon Wsyg) from The Transporter Bridge across in Newport

Looking up at the Transporter Bridge across the River Usk (Afon Wsyg) in Newport

Ducks on the Newport Wetlands Reserve, Uskmouth, Newport

Ducks on the Newport Wetlands Reserve, Uskmouth, Newport

Ducks on the Newport Wetlands Reserve, Uskmouth, Newport

The Severn Esturay from Newport Wetlands Reserve, Uskmouth, Newport

The Severn Esturay from Newport Wetlands Reserve, Uskmouth, Newport

East Usk Lighthouse, Newport Wetlands Reserve, Uskmouth, Newport

East Usk Lighthouse, Newport Wetlands Reserve, Uskmouth, Newport

The RSPB Centre, Newport Wetlands Reserve, Uskmouth, Newport

Mudflats on the Severn Esturay from Newport Wetlands Reserve, Uskmouth, Newport

Views from Newport Wetlands Reserve, Uskmouth, Newport

Views from Newport Wetlands Reserve, Uskmouth, Newport

Views from Newport Wetlands Reserve, Uskmouth, Newport

Views from Newport Wetlands Reserve, Uskmouth, Newport

Views from Newport Wetlands Reserve, Uskmouth, Newport

Views from Newport Wetlands Reserve, Uskmouth, Newport

Views from Newport Wetlands Reserve, Uskmouth, Newport

Views from Newport Wetlands Reserve, Uskmouth, Newport

Views from Newport Wetlands Reserve, Uskmouth, Newport

Grasmere from the ascent up Helm Crag

The Swiss Alps from around Chamonix

The Swiss Alps from around Chamonix

The Swiss Alps from around Chamonix

Sgurr nan Ceathreamhnan from Sgurr nan Ceathreamhnan (West Top)

Bassenthwaite from Cat Bells (Catbells)

The cheshire countryside near Acton Bridge

Dutton Locks on the Weaver Navigation (River Weaver)

Shipwreck on the River Weaver at Dutton Locks

Dutton Locks on the Weaver Navigation (River Weaver)

Shipwreck beyond Dutton Locks on the Weaver Navigation (River Weaver)


Dutton Viaduct and The Weaver Navigation from Dutton Locks

Dutton Viaduct over The Weaver Navigation

Dutton Viaduct over The Weaver Navigation

A train crossing Dutton Viaduct over The Weaver Navigation


Woodland path beside The Weaver Navigation


London bound express train from near Acton Bridge


The Sussex Downs from near the Jack and Jill Windmills, Clayton

Sunset on The Sussex Downs from near the Jack and Jill Windmills, Clayton

The mountains of Rhum from the summit of An Sgurr (Eigg)

On the summit of An Sgurr (Eigg) with Rhum in the background
To contribute to go4awalk.com or to contact us about anything at all - see Talk To Us.
For help see Help.
go4awalk.com and go4awalk.co.uk are registered trademarks of TMDH Limited.
Copyright © 2000-2026 TMDH Limited. All rights reserved.
Copyright Terms & Conditions Privacy Statement
A - Z Walks Home Log On/Accounts Photo Gallery Walk Ideas and Collections Fell Facts Hill Skills Walking Questions and Answers Your Stories News Competitions Product Reviews/Gear Tests Walking Gear Guides Peaks and Mountains Peak Bagging Find New Walking Friends Camping GPS Waypoints for Walking Contents Walk Search Talk To Us go4awalk.com Help Free Example Walks Newsletter