Walk photographs and pictures submitted by Mike Walker

The most recent pictures are at the top.
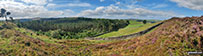
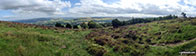
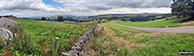
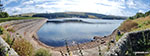

Sign near Errwood Reservoir in The Goyt Valley Yacht sailing on Errwood Reservoir in The Goyt Valley Errwood Reservoir in The Goyt Valley Descending The Goyt Valley Deep Clough in The Goyt Valley Deep Clough in The Goyt Valley Errwood Reservoir visible through a gap in the trees on the lower slopes of Shining Tor Descending from Shining Tor Shutlingsloe from Shining Tor Unusual gate on Shining Tor with Shutlingsloe on the horizon Shining Tor summit Cat's Tor from the summit of Shining Tor The trig point on the summit of Shining Tor Looking South towards Shutlingsloe and Croker Hill from the summit of Shining Tor Looking West towards Teggs Nose from the summit of Shining Tor Looking North-West from the summit of Shining Tor Panoramic View from the summit of Shining Tor Cat's Tor and Shining Tor from Windgather Rocks On Windgather Rocks Climbers on Windgather Rocks On Windgather Rocks On Windgather Rocks Peak & Northern Footpaths Society Public Footpath Sign No. 270 on Taxal Edge Goyt Forest Goyt Forest The Goyt Valley The Goyt Valley The Goyt Valley The Goyt Valley The Goyt Valley Footpath in The Goyt Valley The Goyt Valley The Goyt Valley The Goyt Valley Fernilee Reservoir Dam, The Goyt Valley Fernilee Reservoir, The Goyt Valley Fernilee Reservoir, The Goyt Valley Errwood Reservoir, The Goyt Valley Errwood Reservoir, The Goyt Valley Errwood Reservoir Dam, The Goyt Valley Former mine train locomotive outside the slate mine shop at Honister Hause Slate sculptures outside the slate mine shop at Honister Hause Slate sculpture of an eagle outside the slate mine shop at Honister Hause Honister Hause from the lower slopes of Grey Knotts The High Stile ridge (left), Buttermere and the Grasmoor massif (right) from Brandreth Green Gable (left) and Great Gable (centre) from Brandreth summit cairn Green Gable (left) and Great Gable (centre left) from the summit of Brandreth Green Gable (left) and Great Gable (centre left) and the shoulder of Kirk Fell from Loft Beck Green Gable (left) Great Gable (centre left), Scafell Pike (centre distance) and Kirk Fell (centre right) from Hay Stacks (Haystacks) Looking Stead (Pillar) and Pillar itself towering above the upper reaches of Ennerdale from Hay Stacks (Haystacks) Ennerdale Water from Hay Stacks (Haystacks) Grassmoor (left) and Grisedale Pike (right) from Hay Stacks (Haystacks) Robinson from Hay Stacks (Haystacks) Seat (Buttermere) and High Crag (Buttermere) from Hay Stacks (Haystacks) On Hay Stacks (Haystacks) summit Innominate Tarn with Great Gable beyond Green Crag (Buttermere) from Hay Stacks (Haystacks) Crummock Water and Buttermere from Green Crag (Buttermere) Green Crag (Buttermere) Dubs Hut Dubs Hut Scarth Gap (left), Seat (Buttermere), High Crag (Buttermere) and High Stile from Fleetwith Pike Dale Head (Newlands) from Fleetwith Pike summit The rocky outcrop on the summit of Honister Crag (Black Star) Fleetwith Pike (foreground left) with High Crag, High Stile and Red Pike (Buttermere) beyond towering over Buttermere from Honister Crag (Black Star) Dale Head (Newlands) from Honister Crag (Black Star) Honister Quarries with Fleetwith Pike and Honister Crag (Black Star) beyond Former mine entrance below Bell Crags Honister Hause from Bell Crags Honister Crag (Black Star) and Bell Crag (right) from Honister Hause Yew Crag and Yewcrag Quarries from Honister Hause Looking down towards Buttermere from Honister Hause with Bell Crags (left) and Robinson (centre right), Hindscarth (right) & the shoulder of Dale Head (Newlands) far right) Bardon Mill Quarry from the summit of Bardon Hill Trig Point on the summit of Bardon Hill Telecommunications Mast near the summit of Bardon Hill Building near the summit of Bardon Hill Bench on the path up Bardon Hill Yellow warniing sign at the bottom of Bardon Hill Footbridge at the bottom of Bardon Hill Spidean Coinich (Quinag), Sail Gharbh (Quinag) and Sail Ghorm (Quinag) from the Assynt viewpoint on the A838 (North Coast NC500 route) at Bealach Strome Panoroama featuring Glas Bheinn (Ben More Assynt) and the shoulder of Spidean Coinich (Quinag) from the Assynt viewpoint on the A838 (North Coast NC500 route) at Bealach Strome Glas Bheinn (Ben More Assynt) from the Assynt viewpoint on the A838 (North Coast NC500 route) at Bealach Strome Ben Aird da Loch and Stack of Glencoul beyond Loch Glencoul from the Assynt viewpoint on the A838 (North Coast NC500 route) at Bealach Strome Ben Stack from the A838 (North Coast NC500 route) at Loch Tarbhaidh Foinaven (Ganu Mor) from the A838 (North Coast NC500 route) at Loch Tarbhaidh Meal nan Cra, Beinn Spionnaidh and Cranstackie from the A838 (North Coast NC500 route) at Loch Tarbhaidh The beach at Traigh Allt Chailgeag from the A838 (North Coast NC500 route) Roadstead Bay, Loch Eriboll from the A838 (North Coast NC500 route) near Kempie Ard Neackie & Loch Eriboll with Cranstackie, Beinn Spionnaidh Meall nan Cra, Meall Meadhonach, and Beinn Ceannabeinne beyond from the A838 (North Coast NC500 route) near Heilam Ard Neackie & Loch Eriboll with Cranstackie & Beinn Spionnaidh beyond from the A838 (North Coast NC500 route) near Heilam Flowering yellow broom on the lower slopes of Ben Hope Waterfalls on the lower slopes of Ben Hope Waterfalls on the lower slopes of Ben Hope Waterfalls on the lower slopes of Ben Hope Strath More from LeitirMuiseal, Ben Hope Waterfalls near LeitirMuiseal, Ben Hope Ben Hope from LeitirMuiseal Strath More from part way up Ben Hope Creag Riabhach and Strath More from part way up Ben Hope Strath More from part way up Ben Hope Strath More from part way up Ben Hope Ben Hope summit from a cairn part way up Strath More from a cairn on Ben Hope Strath More from Ben Hope Loch Hope from Ben Hope Loch Hope from Ben Hope Ben Hope summit Loch a' Ghobha-Duibh (centre), Dubh-Loch Creige Riabhaich and Meallan Liach (left) with Loch an Dherue and An Caisteal (Ben Loyal) (in the distance) from the summit of Ben Hope An Garbh-Choire from the summit of Ben Hope Panorama from the summit of Ben Hope The view from the summit of Ben Hope The view from the summit of Ben Hope The view from the summit of Ben Hope The trig point on the summit of Ben Hope Panorama of Ben Hope summit plateau from the north Panorama from the top of Ben Hope Ben Hope summit from the north Loch a' Ghobha-Duibh and Dubh-Loch Creige Riabhaich from the top of Ben Hope Loch na Seilg from the top of Ben Hope Loch Eriboll, Loch Hope & the Atlantic Ocean from the north ridge of Ben Hope Loch Eriboll and Loch Hope from the north ridge of Ben Hope View from the north ridge of Ben Hope The north ridge of Ben Hope Dubh-loch na Beinne from the north ridge of Ben Hope On the north ridge of Ben Hope The north ridge of Ben Hope On Ben Hope Approaching the tricky'north ridge of Ben Hope Panorama from the upper slopes of Carn a' Ghallaich, Ben Hope Looking north from the upper slopes of Carn a' Ghallaich, Ben Hope Looking north east from the upper slopes of Carn a' Ghallaich, Ben Hope Ben Hutig from the upper slopes of Carn a' Ghallaich, Ben Hope Meallan Liath (Assynt) (centre) with the shoulder of An Caisteal (Ben Loyal) (behind left) and Loch Na Seilg in the foreground from Carn a' Ghallaich, Ben Hope Beinn Ceannabeinne across Loch Hope from Carn a' Ghallaich, Ben Hope Cranstackie, Beinn Spionnaidh and Meall nan Cra across Loch Hope from  Carn a' Ghallaich, Ben Hope Foinaven (Ganu Mor), Cranstackie, Beinn Spionnaidh and Meall nan Cra from Carn a' Ghallaich, Ben Hope Gully on the lower slopes of Ben Hope Loch Hope and the smaller Dubh-loch na Beinne from the lower slopes of Ben Hope Looking down to Waterfalls on the lower slopes of Ben Hope The lower slopes of Ben Hope Waterfalls above Muiseal on the lower slopes of Ben Hope with Ben Hope itself towering above in the background Waterfalls above Muiseal on the lower slopes of Ben Hope with Ben Hope itself towering above in the background Waterfalls above Muiseal on the lower slopes of Ben Hope Waterfalls above Muiseal on the lower slopes of Ben Hope Muiseal, Luib Bhan and Strath Mor from the lower slopes of Ben Hope Waterfalls above Muiseal on the lower slopes of Ben Hope Waterfalls above Muiseal on the lower slopes of Ben Hope Baslow Church Calver Weir on the River Derwent The River Derwent near Calver The River Derwent near Calver New Bridge over The River Derwent The River Derwent from Froggatt Bridge The River Derwent from Froggatt Bridge On Froggatt Edge Curbar Edge from Baslow Edge Curbar, Calver, The Derwent Valley and Baslow from Baslow Edge The view from Baslow Edge Wellington's Monument on Baslow Edge The Companion Stone on Eaglestone Flat Baslow from Gardom's Edge Baslow from Gardom's Edge The trig point on Birchen Edge The view from the trig point on Birchen Edge Nelson's Monument on Birchen Edge Baslow from Birchen Edge The view from Birchen Edge Birchen Edge The Robin Hood beside Birchen Edge Car Park A cold and very frosty November morning in Chatsworth Park Nat Ceiswyn in Cwm Ratgoed Mynydd Cymerau from Cwm Ratgoed Ruined chapel in Cwm Ratgoed Cwm Ratgoed from the lower slopes of Mynydd Dolgoed Cwm Ratgoed from Mynydd Dolgoed The Cwm Nant Ceiswyn from the Mynydd Dolgoed ridge Looking south-west from the Mynydd Dolgoed ridge On the Mynydd Dolgoed ridge from Craig Portas Waun-oer and Cribin Fawr from the summit of Craig Portas The grassy summit of Craig Portas Craig Portas (East Top) from the lower slopes of Craig Portas Maesglase (Craig Rhiw-erch) (left) and Maesglase (Maen Du) (right) from the lower slopes of Craig Portas Maesglase (Craig Rhiw-erch) (left), Maesglase (Maen Du) (centre) and Craig Portas (East Top) from the lower slopes of Craig Portas Another boundary stone on Craig Portas Boundary stone on Craig Portas Craig Portas from Cribin Fawr Marker stone on the summit of Cribin Fawr Post marking the summit of Cribin Fawr Waun-oer from Cribin Fawr Looking back up to Waun-oer from the bwlch between Waun-oer and Cribin Fawr Tackling the steep descent from the summit of Waun-oer The trig point on the summit of Waun-oer The Cadair Idris (penygadair) massif from the summit of Waun-oer Mynydd Dolgoed and Cwm Ratgoed from Mynydd Ceiswyn Cwm Ratgoed from Mynydd Ceiswyn Waun-oerd from Mynydd Ceiswyn Looking south from Mynydd Ceiswyn The grassy summit of Mynydd Ceiswyn with Waun-oer in the background The Cadair Idris (Penygadair) massif from Mynydd Ceiswyn The path up to Mynydd Ceiswyn through Ffridd Newydd from Cwm Ratgoed Sign at Rhiw Gwerdydd asking walkers to refrain from building stone cairns Huge rock on the Pony Path below Rhiw Gwerdydd Barmouth and the Mawddach Estuary from the summit of Craig-y-llyn A large and very stubborn Bull standing in the middle of the leading road down from Llynnau Cregennen Tarrau Mawr (Craig-las) from the path near Llynnau Cregennen Tarrau Mawr (Craig-las) and Craig-y-llyn from the path near Ty'n-llidiart Sheep dip west of Dyffr-ydan Tarrau Mawr (Craig-las) (left) from the Pony Path below Rhiw Gwerdydd Cyfrwy (The Saddle) and Cadair Idris (Penygadair) consumed by cloud from Rhiw Gwredydd The Mawddach Estuary and the Y Garn (Rhinogs) massiff beyond from the summit of Tyrrau Mawr (Craig-las) Barmouth and the Mawddach Estuary from the summit of Tyrrau Mawr (Craig-las) Barmouth and the Mawddach Estuary from the summit of Tyrrau Mawr (Craig-las) On the summit of Tyrrau Mawr (Craig-las) Craig-y-llyn from Tyrrau Mawr (Craig-las) Ladder stile on the summit of Tyrrau Mawr (Craig-las) with Cyfrwy (The Saddle) and Cadair Idris (Penygadair) in the background Approaching the summit of Tyrrau Mawr (Craig-las) Barmouth and the Mawddach Estuary from the summit of Craig-y-llyn Braich Ddu (Craig Cwm-llwd) from the summit of Craig-y-llyn Tyrrau Mawr from Craig-y-llyn Brocken Spectre with Llyn Cyri beyond from Twll yr Ogof (Craig-y-llyn) Y Garn (Rhinogs) from Twll yr Ogof Llyn Cyri from Braich Ddu (Craig Cwm-llwyd) The Mawddach Estuary from the summit of Braich Ddu (Craig Cwm-llwyd) Fence corner marking the summit of Braich Ddu (Craig Cwm-llwyd) Looking south-east down the track from Craigmerwydd towards Tyrrau Mawr Looking east down the track from Craigmerwydd towards Foel Offrwm The ruin at Hafotty-fach Llynnau Cregennen The Greyhound Inn, Bothel Heading back to Bothel from Borrowscale Track on Borrowscale Caermote Hill from Caermote Roman Fort The summit of Caermote Hill The Northern Fells (Binsey (left), Blencathra or Saddleback and Skiddaw), Bassenthwaite Lake and The North Western Fells (Sale Fell, Broom Fell, Lord's Seat and Barf) from the summit of Caermote Hill Caermote Hill from St. John's Hill (Caermote Hill) St. John's Hill (Caermote Hill) The rather uninspiring summit of St. John's Hill (Caermote Hill) St. John's Hill (Caermote Hill) Lambing time on Borrowscale Bothel from Borrowscale The other entrance to the woods below Swinside (Portinscale) Cat Bells, High Spy (just poking up) and Dale Head (Newlands) (in the distance far right) from the Swinside Inn near Portinscale Cottages next door to the Swinside Inn near Portinscale Sign outside the Swinside Inn near Portinscale The Swinside Inn near Portinscale The rather uninspiring summit of Swinside (Portinscale) The view north from the summit of Swinside (Portinscale) featuring Skiddaw and Blencathra The view north west from the summit of Swinside (Portinscale) featuring Lord's Seat (Whinlatter), Barf and Bassenthwaite Lake The view from the summit of Swinside (Portinscale) featuring Derwent Water, Cat Bells , Maiden Moor, High Spy, Dale Head (Newlands), Hindscarth, Robinson, Causey Pike, Sail, Crag Hill (Eel Crag), Barrow and Gridedale Pike The entrance to the woods below Swinside (Portinscale) The setting sun from Nab Scar on The Fairfield Horeshoe Rydal Water (centre) with Lake Windermere (top left) and Grasmere (right) from Nab Scar on The Fairfield Horeshoe Nab Scar summit cairn on The Fairfield Horeshoe Sunset from Heron Pike on the Fairfield Horseshoe The rocky outcrop on the summit of Heron Pike on The Fairfield Horeshoe Heron Pike (North Top) summit cairn on The Fairfield Horeshoe Sun set over Heron Pike (North Top) on The Fairfield Horeshoe Great Rigg and Fairfield from Rydal Fell on The Fairfield Horeshoe Stone Arthur from Rydal Fell on The Fairfield Horeshoe Grasmere from Rydal Fell on The Fairfield Horeshoe Great Rigg from Rydal Fell on The Fairfield Horeshoe Great Rigg summit cairn on The Fairfield Horeshoe Great Rigg summit cairn on The Fairfield Horeshoe Seat Sandal from Great Rigg on The Fairfield Horeshoe Great Rigg from Fairfield on The Fairfield Horeshoe On the summit of Fairfield Fairfield summit wind shelter The Helvellyn Ridge featuring Dollywaggon Pike, Nethermost Pike, Helvellyn and Striding Edge (High Spying How) from Fairfield Lake Windermere and Rydal Valley from Rydal Head with Heron Pike on the right Helvellyn (centre) from Hart Crag St Sunday Crag from Hart Crag Great Rigg from Hart Crag Heron Pike, Heron Pike (North Top), Great Rigg, Rydal Head and Fairfield from Hart Crag Hart Crag summit cairn Hart Crag from Dove Crag Great Rigg, Fairfield, Hart Crag and St Sunday Crag from Dove Crag Dove Crag summit cairn Dove Crag summit cairn Middle Dodd, Red Screes, Snarker Pike, the Scandale Valley and Lake Windermere from High Pike (Scandale) High Pike (Scandale) summit cairn Heron Pike (North Top) from Low Pike (Scandale) Heron Pike from Low Pike (Scandale) High Pike (Scandale) from Low Pike (Scandale) Lake Windermere, Nab Scar, Heron Pike, Heron Pike (North Top) and Great Rigg (far right) from the summit of Low Pike (Scandale) Rocky outcrop marking the summit of Low Pike (Scandale) with High Pike (Scandale) (above left) in the background Rocky outcrop marking the summit of Low Pike (Scandale) The high drystone wall on Low Pike (Scandale) Bakestall from the Cumbria Way, Back O' Skiddaw Dash Beck Dead Crags (Bakestall) from Birkett Edge Dash Beck and Black Nettle Hause from Birkett Edge Skiddaw in the snow from Bakestall summit cairn Bakestall summit cairn Bakestall summit cairn Deep snow on a very cold and snowy Skiddaw Descending towards Bakestall from a very cold and snowy Skiddaw The trig point and viewpoint indicator on the summit of a very cold and snowy Skiddaw The trig point on the summit of a very cold and snowy Skiddaw Mike & his dog on the a very cold and snowy Skiddaw Bowscale Fell (left) and Blencathra or Saddleback with Sharp Edge clearly visible (centre right) in the snow from Sale How (Skiddaw) The rocky summit of Sale How (Skiddaw) in the snow with Bowscale Fell (left) and Blencathra or Saddleback with Sharp Edge clearly visible (right) on the horizon Sale How (Skiddaw) in the snow from Skiddaw (Little Man) Bowscale Fell (left) and Blencathra or Saddleback with Sharp Edge clearly visible (centre) with a dusting of snow from Skiddaw (Little Man) Derwent Water and Keswick from the lower slopes of Skiddaw  Pike of Blisco (Pike o' Blisco) from Mickleden Pike of Stickle (Pike o' Stickle) and Harrison Stickle from Mickleden Pike of Stickle (Pike o' Stickle) from Mickleden Looking back up to Black Crags (Langdale) summit cairn Pike of Stickle (Pike o' Stickle) from Black Crags (Langdale) summit cairn Rosset Pike from Black Crags (Langdale) summit cairn Black Crags (Langdale) summit cairn Great Langdale from Black Crags (Langdale) Black Crags (Langdale) Black Crags (Langdale) from Martcrag Moor Pike of Stickle (Pike o' Stickle) from Martcrag Moor Black Crags (Langdale) from Martcrag Moor Mickleden from Pike of Stickle (Pike o' Stickle) Harrison Stickle from Pike of Stickle (Pike o' Stickle) Pike of Stickle (Pike o' Stickle) summit cairn Harrison Stickle from Pike of Stickle (Pike o' Stickle) Great Langdale from Pike of Stickle (Pike o' Stickle) summit Pike of Stickle (Pike o' Stickle) summit cairn Harrison Stickle from Pike of Stickle (Pike o' Stickle) Pike of Stickle (Pike o' Stickle) Harrison Stickle summit cairn Cairns on Harrison Stickle Great Langdale from the summit of Harrison Stickle On the summit of Harrison Stickle Pike of Stickle (Pike o' Stickle) from Harrison Stickle Pavey Ark from Harrison Stickle Pavey Ark and Stickle Tarn from Harrison Stickle Great Langdale from Pavey Ark summit Thunacar Knott from Pavey Ark summit Harrison Stickle from Pavey Ark summit Pavey Ark summit Stickle Tarn from Pavey Ark Half-way up Pavey Ark Stickle Tarn from the summit of Pavey Ark Brett climbing Pavey Ark Pavey Ark from Stickle Tarn Harrison Stickle and Pavey Ark from Stickle Tarn Harrison Stickle from the outflow from Stickle Tarn Brett resting at Stickle Tarn with Pavey Ark Pavey Ark from Stickle Tarn Harrison Stickle from Stickle Tarn Looking back down the path up to Stickle Tarn with Lingmoor Fell in the background Brett and a duck at Stickle Tarn Brett at Stickle Tarn with Pavey Ark behind Harrison Stickle and Pavey Ark beyond Stickle Tarn Stickle Ghyll Ghyll scambling in Stickle Ghyll River Fallan near Kirkton Farm near Crainlarich with Cruach Adrain The remains of St Fillan's Priory, Kirkton Farm Railway Bridge over Allt Gleann a' Chlachain north of  Auchtertyre Beinn Chaorach from Gleann a' Chlachain Cloud formation making Beinn Challum look like its erupting from the slopes towards Gleann a' Chlachain Beinn Dubhchraig, Ben Oss, Beinn Chuirn and Gleann a' Chlachain from the slopes of Beinn Challum Beinn Challum from the slopes towards Gleann a' Chlachain Ben Mor, Stob Binnein and Cruach Adrain from Beinn Challum Creag Mhor from Beinn Challum Beinn Dubhchraig, Ben Oss and Beinn Chuirn from Beinn Challum Ben More and Stob Binnein from Beinn Challum summit Beinn Challum summit cairn Beinn Challum (South Top) from Beinn Challum Beinn Challum (South Top) summit cairn with Ben More and Stob Binnein in the distance Unusual cloud formations above Beinn Challum Unnamed Scottish burn on moorland above Kirkton Farm near Crainlarich Awkward stile over a deer fence on moorland above Kirkton Farm near Crainlarich Beinn Dubhchraig, Ben Oss and Beinn Chuirn from moorland above Kirkton Farm near Crainlarich Footbridge over the railway above Kirkton Farm near Crainlarich Sheepfold  above Kirkton Farm near Crainlarich Bridge over the River Fallan near Kirkton Farm near Crainlarich River Fallan near Kirkton Farm near Crainlarich The Drovers Inn, Inverarnan Grey Mare's Tail (Ben Glas Burn) waterfall Mountain Goat above Ben Glas Burn Mountain Goats above Ben Glas Burn Beinn Chabhair from Ben Glas Burn Lochan Beinn Chabhair On the summit of Beinn Chabhair Stob a' Choin (left) and Meall Mor (Strath Gartney) (right) above Glen Larig from Beinn Chabhair An Caisteal (Glen Falloch) (left) and Beinn a' Chroin from Beinn Chabhair Ben Mor and Stob Binnein (far right) from Beinn Chabhair Beinn a' Chleibh, Ben Lui (Beinn Laoigh), Ben Oss and Beinn Dubhchraig from Beinn Chabhair Meall an Fhudair (mid distance right) and Ben Bhuidhe on the horizon from Beinn Chabhair The Cobbler (Ben Arthur), Beinn Narnain, Beinn Ime, Ben Vane and Ben Vorlich (The Arrochar Alps) from Beinn Chabhair Ben Lomond from Beinn Chabhair Beinn Chabhair summit cairn Approaching the summit of Beinn Chabhair Meall nan Tarmachan from Lochan Beinn Chabhair Lochan Beinn Chabhair Ben Glas Burn Ben Vorlich (The Arrochar Alps) from Ben Glas Burn Ben Glas Burn Beinn Chabhair from Ben Glas Burn Ben Glas Burn Ben Glas Burn Ben Vorlich (The Arrochar Alps) from Ben Glas Burn Creag nan Caorann (left) and Beinn Dubhcraig (centre right) from Ben Glas Burn Meall an Fhudair towering above Inverarnan (bottom left) from Ben Glas Burn Garabal Hill and Inverarnan from Ben Glas Burn The River Falloch - looking south from Beinglas Campsite Bridge The River Falloch - looking north from Beinglas Campsite Bridge The Stagger Inn sign outside the Drovers Inn in Inverarnan River Dochart at Auchessan River Dochart at Auchessan Meall Glas ((Glen Lochay)) and Beinn Cheathaich towering above Auchessan Sgiath Chuil looms over Glen Dochart near Auchessan Meall Glas (Glen Lochay) from Meal Glas Beag Ben Challum from Meall Glas (Glen Lochay) Meall Glas (Glen Lochay) summit with Ben Challum in the background Ben More from Meall Glas (Glen Lochay) Meall Glas (Glen Lochay) summit cairn Trig point and cairn on the summit of Beinn Cheathaich Glen Lochay from Meall a' Churain Meall a' Churain summit cairn On the summit of Sgiath Chuil Stob nan Clach (centre) and Creag Mhor beyond Beinn Cheathaich (right) from the summit of Sgiath Chuil Beinn Challum from the summit of Sgiath Chuil Beinn Sheasgarnaich from the summit of Sgiath Chuil Meall Ghaordaidh from the summit of Sgiath Chuil Sgiath Chuil summit cairn with Stob Binnein and Ben More (centre right) in the distance Approaching Sgiath Chuil Allt Riobain Dam Allt Riobain with Meall Glas (Glen Lochay) and Beinn Cheathaich on the horizon Allt Riobain with Sgiath Chuil (left) and Sgiath Chrom beyond Allt Riobain waterfalls with Sgiath Chuil (left) and Sgiath Chrom on the horizon Allt Riobain waterfalls Allt Riobain with Meall Glas (Glen Lochay) and Beinn Cheathaich in the distance Some of the local cattle near Auchessan Waymark showing the route through Auchessan Stob Fear-tomhais (Ceann na Baintighearna) reflected in Loch Voil Looking south east down Loch Voil towards Inverlochlarig Golden hues on Stob a' Choin from Inverlochlarig Sunset over Stob a' Choin from Inverlochlarig Local man taking his dog and lamb for a walk near Inverlochlarig Outhouse near Inverlochlarig Farm Calfs in Inverlochlarig Glen Contented Bull in Inverlochlarig Glen Lochan at the highest point of Creagan Liatha Ben More and Stob Binnein from Stob Garbh (Cruach Ardrain) Beinn Tulaichean (left) and Cruach Ardrain from the summit of Stob Garbh (Cruach Ardrain) Stob Garbh (Cruach Ardrain) summit cairn Cruach Ardrain from the bealach south of Stob Garbh (Cruach Ardrain) Crianlarich from the summit of Cruach Ardrain Ben Vane, Beinn Ime and Beinn Narnain from the summit of Cruach Ardrain Beinn a' Chleibh, Ben Lui (Beinn Laoigh) (snowy peak in the middle), Ben Oss and Beinn Dubhchraig from the summit of Cruach Ardrain Ben Vorlich (Coire Garbh) and Stuc a'Chroin from the summit of Cruach Ardrain Ben Ledi from the summit of Cruach Ardrain Ben Lomond from the summit of Cruach Ardrain Stob Garbh (Cruach Ardrain) from the summit of Cruach Ardrain Ben More (left) and Stob Binnein (right) from the summit of Cruach Ardrain Cruach Ardrain summit cairn Cruach Ardrain summit from the 1st slighty lower cairn with Ben More (left) and Stob Binnein (right) in the background Beinn Tulaichean from the bealach above Coire Earb Me in my brand new Berghaus Men's Antelao 3 Layer GORE-TEX® Pro Jacket on the summit of Cruach Ardrain Cruach Ardrain (left) and Stob Garbh (Cruach Ardrain) (right) from the summit of Beinn Tulaichean A distant Ben Lomond from the summit of Beinn Tulaichean Beinn a' Choin from the summit of Beinn Tulaichean Beinn a' Chleibh, Ben Lui (Beinn Laoigh) (centre, with snow on it), Ben Oss and Beinn Dubhchraig from the summit of Beinn Tulaichean The summit cairn on Beinn Tulaichean with Cruach Ardrain in the background Ben More (left) and Stob Binnein (right) from the summit of Beinn Tulaichean Beinn Tulaichean summit cairn with Stob a' Choin in the background Loch Doine, Loch Voil, Stob Fear-tomhais (Ceann na Baintighearna) and Inverlochlarig from Beinn Tulaichean Ben More (left) and Stob Binnein (right) from the upper slopes of Beinn Tulaichean Inverlochlarig with Stob Fear-tomhais (Ceann na Baintighearna) beyond from the upper slopes of Beinn Tulaichean Stob Invercarnaig from Inverlochlarig Burn Cruach Ardrain from Inverlochlarig Burn Beinn Tulaichean from Inverlochlarig Burn Stob Fear-tomhais (Ceann na Baintighearna) from Inverlochlarig Stob a' Choin from Inverlochlarig Stob Breac from Inverlochlarig The date 1674 carved into a door frame in Askham village Askham village Punchbowl Inn, Askham Askham church 1832 carved above the door to Askham church Knipescar Common from near Askham church Stone stable near Helton village Knipescar Common from Helton village On the back road through Helton village Tree and barn near Widewath Farm Heughscar Hill from Ketley Gate The lone gatepost that remains at Ketley Gate Ullswater from Heughscar Hill summit cairn Gently climbing across Haber Hill The Queens Head in Askham Village Single stone hut on the slopes of Jeffrey's Mount from Borrowdale Wood Borrow Beck flowing through Borrowdale (Howgills) with Whinfell Common (left) and Winterscleugh (right) from the lower slopes of Grayrigg Forest Whinash, Winterscleugh, Roundthwaite Common, Belt Howe, Birk Knott, Casterfell Hill and Jeffrey's Mount from The Repeater Station on Grayrigg Forest The Repeater Station on Grayrigg Forest with Whinfell Common in the background Telecommunications Mast on Grayrigg Forest Grayrigg Forest summit trig point with The Howgill Fells in the background The view south-east and west from the summit of Grayrigg Pike (Grayrigg Forest) Blease Fell and The Howgill Fells 2000ft'ers - Randygill Top, The Calf, Calders and Fell Head (Howgills) - from Grayrigg Pike (Grayrigg Forest) summit Grayrigg Pike (Grayrigg Forest) summit cairn with Blease Fell in the background Birk Knott, Jeffrey's Mount, The M6 Motorway, Powson Knott, Blease Fell, Fell Head (Howgills) and The Howgill Fells from Grayrigg Pike (Grayrigg Forest) The M6 Motorway and a Wind Sock on the lower slopes of Grayrigg Forest Blease Fell (left), Fell Head (Howgills) and The M6 Motorway from the stream crossing on the lower slopes of Grayrigg Forest Great Coum (left), Greyrigg Pike and Little Coum (right) from the lower slopes of Grayrigg Forest Powson Knott from the lower slopes of Grayrigg Forest Cleugh Gill (left) and Blease Fell from the lower slopes of Grayrigg Forest Blease Fell (left), Fell Head (Howgills) and The Calf (right)  above Low Carlingill from the lower slopes of Grayrigg Forest Jeffery's Mount and The M6 Motorway (right) from the lower slopes of Grayrigg Forest Blease Fell from Borrowdale Wood Path through Low Park Wood, Whitbarrow Scar Woodland path below Bell Rake, Whitbarrow Scar Descending Bell Rake, Whitbarrow Scar Cave entrance near Bell Rake, Whitbarrow Scar The Southern Lake District Fells from Lord's Seat (Whitbarrow Scar) summit Lord's Seat (Whitbarrow Scar) summit cairn Local on Lord's Seat (Whitbarrow Scar) South from Lord's Seat (Whitbarrow Scar) Approaching Lord's Seat (Whitbarrow Scar) Crags on Whitbarrow Scar (Flodder Allotment) Crags on Flodder Allotment, Whitbarrow Scar Lord's Seat (Whitbarrow Scar) from Flodder Allotment, Whitbarrow Scar Dixon Heights (Newton Fell) from Pether Pots on the Whitbarrow Scar ridge Walking along the Whitbarrow Scar ridge Arnside Knott, Humphrey Head, Dixon Heights (Newton Fell) and Saskills (Newton Fell) from the Whitbarrow Scar ridge Lord's Seat (Whitbarrow Scar) from one of the large cairns on the Whitbarrow Scar ridge On Whitbarrow Scar Witherslack Hall School, Whitbarrow Scar and Lord's Seat (Whitbarrow Scar) (in distance, far right) Another of the several large cairns on the Whitbarrow Scar ridge Witherslack Hall School from Whitbarrow Scar One of several large cairns on the Whitbarrow Scar ridge Large Cairn on Whitbarrow Scar Farrar's Allotment, Whitbarrow Scar The path across Farrar's Allotment on Whitbarrow Scar On Whitbarrow Scar (Farrar's Allotment) Looking South across Foulshaw Moss to Milnthorpe Sands,  Arnside Knott and The forest of Bowland from Mill Side The path through Buckhouse Wood Looking South across Foulshaw Moss to Milnthorpe Sands,  Arnside Knott and The forest of Bowland from Buckhouse Wood above Mill Side Birchen Edge summit trig point Looking north to Nelson's Monument (Birchen Edge) Looking down from Birchen Edge Busy day with plenty of climbers on Birchen Edge Nelson's Monument (Birchen Edge) from The Three Ships on Birchen Edge Royal Soverin - the third of three huge boulders that form The Three Ships on Birchen Edge Defiance - the middle of three huge boulders that form The Three Ships on Birchen Edge Victory -  the first of three huge boulders that form The Three Ships on Birchen Edge Victory (left), Defiance and Royal Soverin (right) - the three large boulders that form The Three Ships on Birchen Edge Nelson's Monument (Birchen Edge) Looking along Birchen Edge from Nelson's Monument (Birchen Edge) Birchen Edge near Nelson's Monument (Birchen Edge) Approaching Nelson's Monument (Birchen Edge) Path through woodland below Birchen Edge Steps up through woodland towards Birchen Edge Footpath to Selah Bridge (& Renwick) from near Hartside Top Cafe Waypoint marker for the c2c (coast to coast) cycle route near Hartside Top Cafe Benty Hill summit cairn Black Fell (Haresceugh Fell) summit Currick near the summit of Watch Hill (Graystone Edge) with Renwick Fell (Thack Moor) in the background Renwick Fell (Thack Moor) from Watch Hill (Graystone Edge) Renwick Fell (Thack Moor) summit trig point Quiet track above Townend, Renwick A lone sheep blocks the track above Renwick Renwick Church Renwick Church The Well, Meerbrook The Roaches and Hen Cloud from Tittesworth Reservoir The Roaches and Hen Cloud from the summit of Hillswood Hillswood summit The Staffordshire countryside near Abbey Wood The Abbey Inn in Abbey Green near Leek The Staffordshire countryside from near Gun (Staffordshire) The Staffordshire countryside from near Gun (Staffordshire) The Roaches and Hen Cloud from the summit of Gun (Staffordshire) Gun (Staffordshire) summit trig point The Roaches from Turner's Pool Sheep near Turner's Pool Turner's Pool Gun (Staffordshire) from near Meadows Farm Woodland path near Meadows Farm The Roaches and Hen Cloud from the lane north of Meerbrook Hen Cloud from the lane north of Meerbrook The Lazy Trout in Meerbrook Meerbrook church Winter Hill (Rivington Moor) from Two Lads (Rivington Moor) Rivington Pike Winter Hill (Rivington Moor) from Rivington Pike Lower Rivington Reservoir from Rivington Pike The three cairns on the summit of Two Lads (Rivington Moor) The tall TV mast on the summit of Winter Hill (Rivington Moor) Memorial on Winter Hill (Rivington Moor) Warning sign on Winter Hill (Rivington Moor) Telecommunications tower on Winter Hill (Rivington Moor) Winter Hill (Rivington Moor) summit trig point Snow on Winter Hill (Rivington Moor) Great Hill and Spitlers Edge from Winter Hill (Rivington Moor) Pigeon Tower (Rivington Moor) with Rivington Reservoir in the distance Pigeon Tower (Rivington Moor) Pigeon Tower (Rivington Moor) Woodland path above Rivington Upper Barn Woodland path above Rivington Cottage Woodland path above Rivington Hall Lower Rivington Reservoir Lower Rivington Reservoir shore path The Castle (Lower Rivington Reservoir) The Castle (Lower Rivington Reservoir) Path through Lever Park from Rivington Lane Car Park 


Send us your photographs and pictures of walks and hikes in the British countryside

If you would like to see your digital photographs as part of this collection, please send them as email attachments (configured for any computer) along with your name to:

and we shall do our best to publish them.

(Guide Resolution = 300dpi. At least = 587 pixels (wide) x 440 pixels (high).)

Send us your walking and hiking photographs and pictures via Facebook

You can also submit photos via our Facebook Page.

NB. Please indicate where each photo was taken.

NB. To see photographs and pictures from a particular walk choose your walk from Walks or use our Walk Search facility.

To see photographs and pictures on, of or from a particular Mountain, Peak, Top or Hill select from Peaks & Mountains' or enter the Mountain, Peak, Top or Hill Name into our 'Photo Search facility.


Follow go4awalk.com on Twitter Follow go4awalk.com on Facebook


Home


Find new Friends to go walking with

Walk all 214 Wainwrights in just 59 Walks. Download GPS Waypoints - Great Walks you must not miss!

Walk The Yorkshire Three Peaks Challenge Walk - All the Latest Route Information, GPS Waypoints and Split Times to keep you on Schedule

Walk The British Three Peaks Challenge Walk - All the Latest Route Information and GPS Waypoints

See our pick of The Best Walks in The Lake District - Great Walks you must not miss!

Walk our pick of the Best Lake District Ridge Walks - Great Walks you must not miss!

Walk our pick of the Best Lake District Walks to do in the rain - Great Walks you must not miss!

Walk our pick of The Best Walks in Snowdonia - Great Walks you must not miss!

Walk our pick of The Best Ridge Walks in Wales - Walks you must not miss!

Walk our pick of The Best Walks in The Brecon Beacons - Great Walks you must not miss!

Walk our pick of The Best Walks in The Yorkshire Dales - Walks you must not miss!

Walk our pick of The Best Walks in The Peak District - Walks you must not miss!

Walk our pick of The Best Walks in The Forest of Bowland - Walks you must not miss!

Walk our pick of The Best Walks in Shropshire - Walks you must not miss!

Walk our pick of The Best Walks in Cheshire - Walks you must not miss!

Walk our pick of The Best Walks in Lancashire - Walks you must not miss!

Not sure where to walk next? Try Peak Bagging - Great Walks you must not miss!

Not sure where to walk next? Walk part of a National Trail - Great Walks you must not miss!

Walks with Downloadable and Uploadable GPS Waypoint Data

Walking Kit and Gear Tested by Walkers

Full Site Search
Do not miss our pick of the Best Walks in the UK